
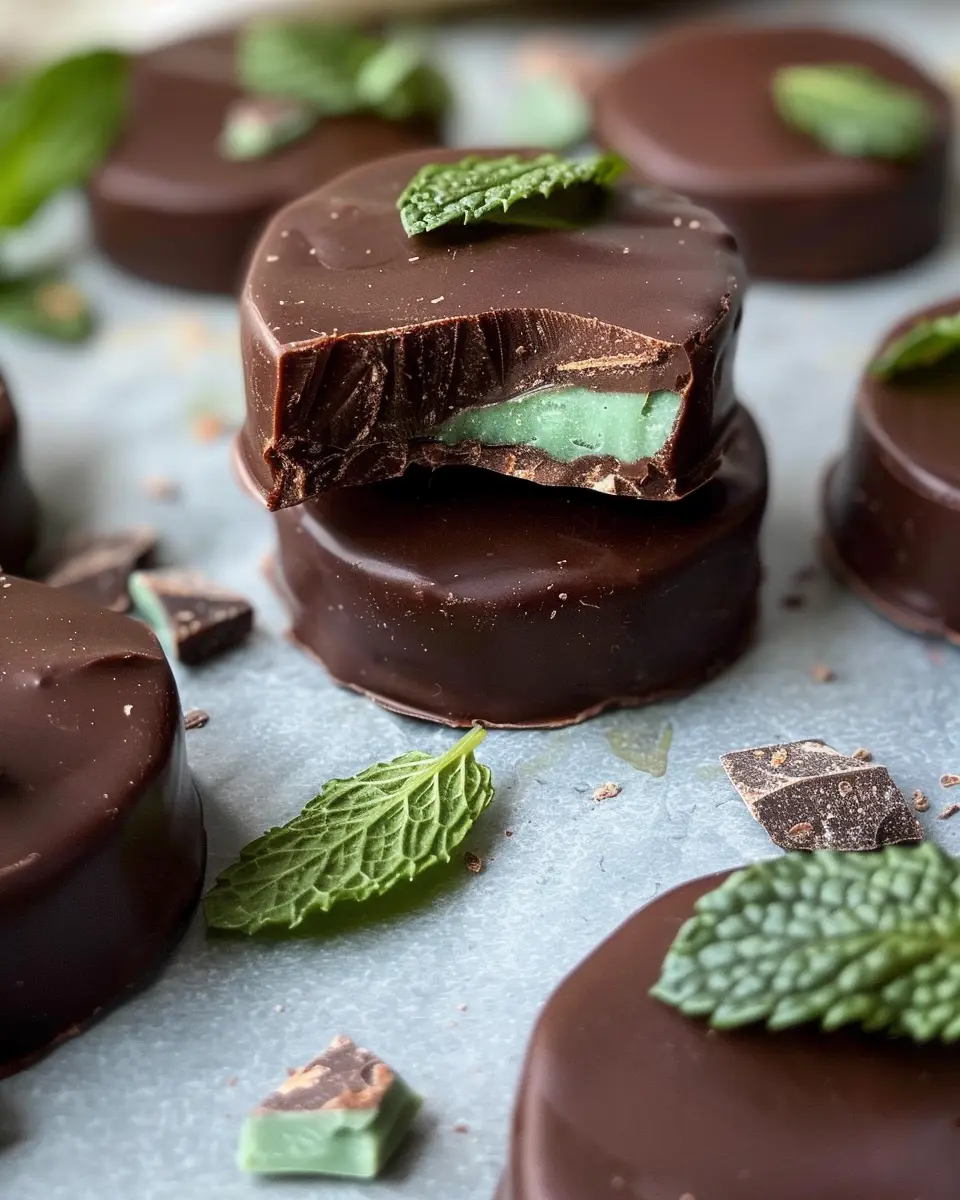
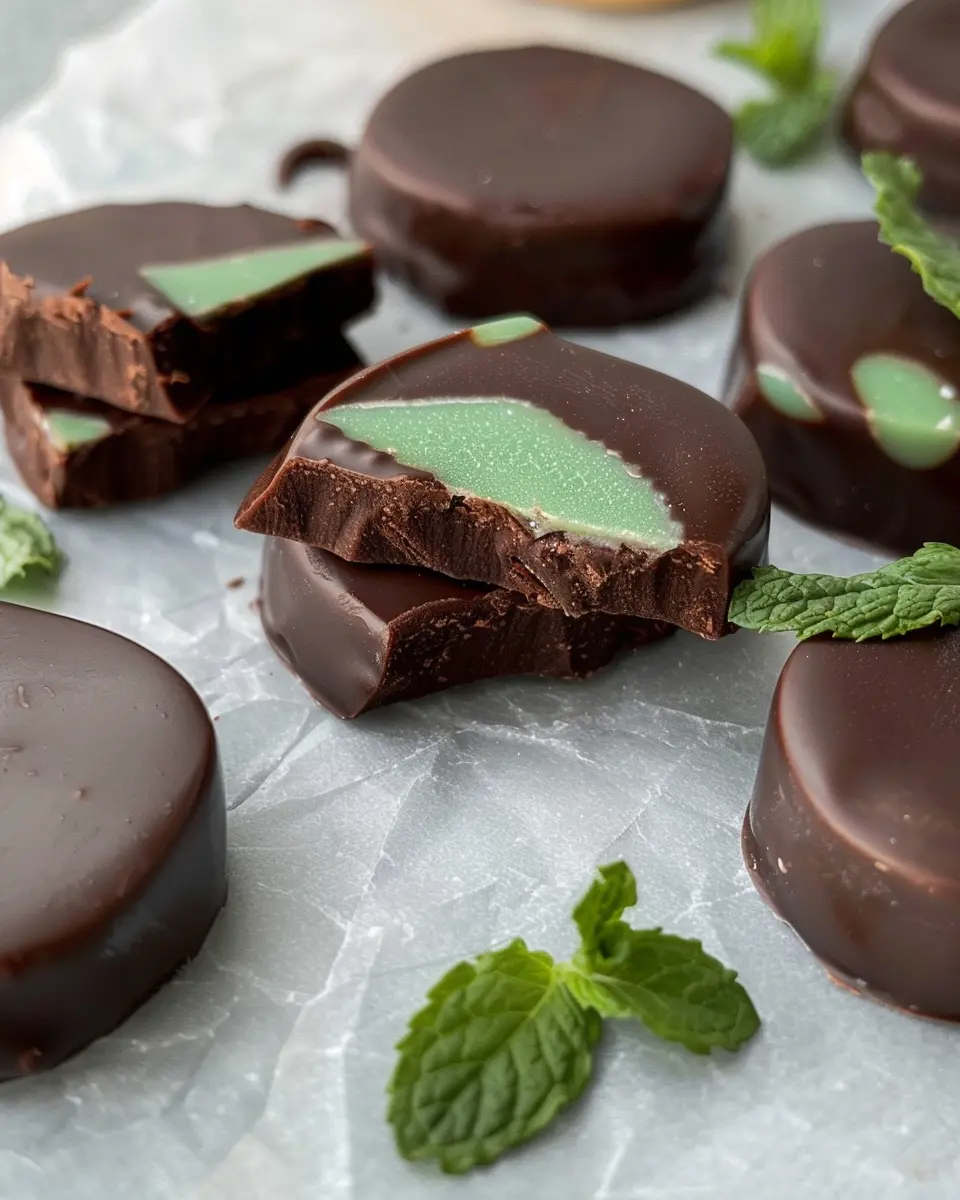
Introduction to Homemade Andes Mint Chocolates
If you’re a lover of chocolate and mint, you’ll be delighted by the rich, refreshing flavors that homemade Andes Mint Chocolates bring to the table. Not only do they satisfy your sweet tooth, but making them yourself offers a delightful twist to the classic treats you often find in stores. Whether you’re transitioning to a Paleo, Keto, or Vegan diet, these chocolates promise a guilt-free indulgence that aligns with your lifestyle.
Why Homemade is Better Than Store-Bought?
Let’s face it—nothing compares to the joy of crafting something with your own hands. When you opt for these homemade Andes Mint chocolates, you control the ingredients, ensuring they’re free from preservatives and artificial flavors. This personalized approach gives you the freedom to adjust the flavors to your liking.
Store-bought versions often contain sugar, dairy, and other additives not suitable for various diets. With homemade chocolates, you can use ingredients that are healthy and meet your dietary preferences, like almond flour or coconut oil. Plus, the satisfaction of experimenting with recipes or putting your spin on a classic is hard to replicate.
Did you know that many store-bought chocolates are loaded with sugar? The American Heart Association recommends limiting added sugars to no more than 6 teaspoons for women and 9 teaspoons for men per day. By making your own chocolates, you can enjoy the rich taste of chocolate without the excess sugar.
Crafting your homemade Andes Mint chocolates also allows you to get creative! Consider hosting a fun night in with friends where everyone creates their own variations. You could add flavors like orange zest or spicy chili for a unique twist. Imagine sampling your creations while sipping on a herbal tea or a creamy coconut milk beverage—now that’s a treat!
Ready to elevate your dessert game? Dive into this recipe and discover how easy and enjoyable it can be to make chocolates at home. Don’t just settle for the ordinary; let your creativity shine with each delectable bite!

Essential Ingredients for Delicious Mint Chocolates
Making homemade Andes mint chocolates is not only a fun and rewarding kitchen project, but it’s also a delightful way to enjoy a treat that fits your dietary preferences. Here’s what you’ll need for these tasty little gems:
-
Cocoa Butter: This serves as the base and gives your chocolates that creamy, melt-in-your-mouth quality. Look for organic, high-quality cocoa butter for the best results. You can grab some from trusted retailers or online stores like Thrive Market.
-
Cocoa Powder: Opt for unsweetened cocoa powder to give your homemade chocolates a rich, chocolatey flavor.
-
Sweetener: For a Keto or Paleo option, consider using erythritol or stevia. If you’re going vegan and grain-free, coconut sugar is also a great alternative.
-
Peppermint Extract: This is where the minty fresh goodness comes from! A little goes a long way, so start with a small amount and adjust to taste.
-
Dark Chocolate: Choose a high-quality dark chocolate that meets your dietary needs—whether that’s vegan or sugar-free.
These simple yet essential ingredients are easy to source and ensure your homemade Andes mint chocolates turn out deliciously every time! For additional tips on sourcing these ingredients, check out the resources from NutritionFacts.org. Happy chocolating!
Step-by-Step Preparation of Homemade Andes Mint Chocolates
Crafting homemade Andes mint chocolates can be a delightful project that not only satisfies your sweet tooth but also caters to your dietary preferences. Whether you’re following a Paleo, Keto, or Vegan lifestyle, these rich, minty chocolates are sure to impress. Let’s dive into this fun and rewarding process!
Melting the Cacao Butter
To begin, gather the following:
- 1 cup of cacao butter
- A double boiler or a heatproof bowl set over a pot of simmering water
-
Chop the Cacao Butter: Start by chopping your cacao butter into small pieces. This helps it melt evenly and quickly.
-
Melt it Down: Place the chopped cacao butter in your double boiler. Allow it to melt gently, stirring occasionally with a spatula. Avoid direct heat as this can scorch the cacao butter. Remember, patience is key here!
-
Consistency Check: Aim for a smooth, glossy texture. This should take about 10 minutes.
Why use cacao butter? It provides a great base that’s rich in antioxidants and healthy fats, making your homemade Andes mint chocolates not only delicious but nutritious as well.
Creating the Mint Filling
Next, let’s move on to the minty goodness that will make these chocolates truly special. For the filling, you’ll need:
- 1 cup of powdered erythritol (or other sweeteners per taste)
- 1 teaspoon of pure peppermint extract
- A pinch of salt
-
Mixing Time: In a mixing bowl, combine the powdered erythritol, peppermint extract, and salt.
-
Stir and Taste: Gradually stir in a few tablespoons of the melted cacao butter until you achieve a thick yet spreadable consistency. Adjust the peppermint flavor to your liking—this is your chance to get that minty kick just perfect!
Molding the Mint Chocolates
Now that you have your filling ready, it’s time to mold those rich flavors into shape. Here’s how:
-
Silicone Molds: Use silicone molds for easy removal. Pour a thin layer of melted cacao butter into each mold, just enough to cover the bottom. Pop them in the freezer for a few minutes to set.
-
Filling Up the Molds: After the base has hardened, add a dollop of your mint filling into each mold, leaving some space for a top layer.
-
Final Touch: Cover the mint filling with more melted cacao butter until the molds are full. Smooth out the top with a spatula.
Preparing the Chocolate Coating
As the molds set, it’s time to prepare the coating, which is the finishing touch for your homemade Andes mint chocolates. For this, gather:
- Additional cacao butter (as needed)
- Optional: cocoa powder for added flavor and color
-
Melt More Cacao Butter: Time to melt any remaining cacao butter using the same double boiler method.
-
Flavor Options: If you want a richer chocolate flavor, consider whisking in some cocoa powder to the melted cacao butter. This will create a delightful dark chocolate coating.
Dipping and Setting the Chocolates
Now for the fun part—dipping your chocolates!
-
Remove from Molds: Gently pop the filled chocolates out of the silicone molds.
-
Dipping Process: Using a fork, dip each chocolate into the melted cacao coating. Let the excess drip off before placing them on a parchment-lined baking sheet.
-
Set to Harden: Allow the chocolates to set at room temperature or in the fridge for quicker results. They should be firm and ready to enjoy in about 30 minutes.
And there you have it! Homemade Andes mint chocolates that are sure to satisfy your cravings while being keto, paleo, and vegan-friendly. Enjoy these delicious treats yourself or gift them to a friend—because who wouldn’t love a box of rich, minty chocolates? Happy making!
Variations on Homemade Andes Mint Chocolates
Keto-Friendly Versions
For those embracing a low-carb lifestyle, homemade Andes mint chocolates can be adjusted to fit the keto diet seamlessly. To maintain that rich chocolate flavor while cutting the carbs, use sugar-free chocolate chips and swap out traditional sweeteners for erythritol or stevia. These alternatives keep the decadence without the blood sugar spikes. You might also want to incorporate coconut oil or grass-fed butter to enhance the texture and taste while adding healthy fats.
Vegan Alternatives
If you’re following a vegan diet, don’t fret—you can still enjoy delightful mint chocolates. Substitute regular chocolate chips with dairy-free versions, and use a plant-based sweetener like agave or maple syrup. Instead of cream, opt for coconut cream to get that luscious, melt-in-your-mouth consistency. This makes your homemade Andes mint chocolates not only delicious but also cruelty-free!
Flavor Additions
Looking to infuse some extra flair into your mint chocolates? Here are some fantastic ideas to consider:
- Nut Butters: Try adding a layer of almond or cashew butter for a nutty twist.
- Spices: A pinch of sea salt or a dash of cayenne pepper can surprise your palate with contrasting flavors.
- Essentials Oils: Mint essential oil can intensify that refreshing minty flavor—just a drop will do!
- Fruit Zest: Lemon or orange zest can lend a delightful citrusy zing.
Feel free to experiment with these variations to find your perfect combination! Each tweak personalizes your homemade Andes mint chocolates and brings a unique twist to the classic. Dive into the world of chocolatey creativity, and let your taste buds guide you!
Cooking Tips and Notes for Homemade Andes Mint Chocolates
Importance of Ingredient Quality
When crafting your homemade Andes mint chocolates, the quality of your ingredients plays a crucial role in the final flavor and texture. Opt for high-quality dark chocolate that is at least 70% cacao for a rich experience. Using organic peppermint oil can enhance the minty freshness without overwhelming sweetness, making your treats truly gourmet. If you’re curious about different brands, check out reviews on specialty chocolate retailers or organic product sites.
Common Mistakes to Avoid
To ensure your chocolate-making experience is smooth, steer clear of these common pitfalls:
- Skipping Tempering: Just melting chocolate isn’t enough. Tempering helps achieve a glossy finish and a satisfying snap.
- Using Low-Quality Ingredients: Cheap chocolate can lead to a less satisfying taste.
- Too Much Peppermint: A little goes a long way! Overdoing it can result in a toothpaste-like flavor. Start with just a few drops and adjust to your taste.
By keeping these tips in mind, your homemade Andes mint chocolates will be a hit!

Serving Suggestions for Homemade Andes Mint Chocolates
Perfect Pairings with Beverages
When enjoying your homemade Andes mint chocolates, consider pairing them with beverages that enhance their rich flavors. A hot cup of peppermint tea can wonderfully complement the minty freshness, balancing the sweetness of your chocolates. For a coffee lover, a dark roast or a touch of espresso can bring out the chocolate’s depth. Alternatively, try a cool glass of almond or coconut milk — it’s a delicious, dairy-free option that pairs exceptionally well with the chocolatey decadence. Looking for more beverage ideas? Check out this guide on tea pairings for inspiration!
Creative Presentation Ideas
Presentation can elevate your homemade chocolates from ordinary to extraordinary. Consider placing them in mini muffin liners for an elegant touch. An attractive gift box or tin can also make a thoughtful present for friends or family. You can add a personal touch by writing a sweet note. For a festive look, arrange the chocolates on a platter adorned with fresh mint leaves or even a colorful napkin for a pop of color. Making your presentation eye-catching is all about creativity — let your instincts guide you!
Time Breakdown for Homemade Andes Mint Chocolates
Creating your own homemade Andes mint chocolates is not just about indulging in that minty chocolate goodness; it’s also about managing your time efficiently. Let’s break it down to make your experience smooth and enjoyable!
Preparation Time
Preparing the ingredients and mixing them together takes about 15-20 minutes. This is the fun part—gathering your paleo, keto, or vegan ingredients and creating a delightful minty filling.
Cooling Time
Next, allow your chocolates to cool and set in the refrigerator for about 30-60 minutes. This step helps the flavors meld beautifully and gives that perfect texture.
Total Time
In total, you’re looking at around 1 hour and 30 minutes from start to finish. Not too bad for a batch of delicious homemade Andes mint chocolates! Want more tips? Check out this article on time management in the kitchen.
By planning accordingly, you’ll not only savor these delights but also impress friends or family with your culinary skills! Happy cooking!
Nutritional Facts for Homemade Andes Mint Chocolates
Calories
Homemade Andes Mint Chocolates pack a delightful flavor without tipping the scale too far. Each piece contains only about 55-65 calories, depending on the specific ingredients used. This makes them an excellent guilt-free treat for chocolate lovers looking to indulge.
Sugar Content
With a focus on healthier ingredients, these mint chocolates feature a significantly reduced sugar content. Using natural sweeteners like stevia or erythritol, you can keep the sugar content around 1-2 grams per chocolate. This means you can enjoy a sweet treat without the sugar spikes that processed candies often bring.
Health Benefits
Indulging in your homemade Andes Mint Chocolates comes with some surprising perks! Rich in antioxidants from cocoa, these treats can boost heart health and improve mood. Plus, if you’re using nutrient-dense options like coconut oil, you’re getting healthy fats that can aid in satiety. Considering the low sugar and high flavor profile, these chocolates can be a delicious addition to a balanced diet.
For more insight into the health benefits of chocolate, feel free to explore resources from Healthline and Medical News Today. Enjoy crafting your delicious, homemade Andes Mint Chocolates!
FAQs about Homemade Andes Mint Chocolates
Creating your own homemade Andes mint chocolates is a delightful experience, but you might have a few questions. Don’t worry, we’ve got the answers!
Can I use regular chocolate instead of dark chocolate?
Absolutely! While dark chocolate gives your homemade Andes mint chocolates that rich, intense flavor, you can use semi-sweet or even milk chocolate if that’s what you prefer. Just keep in mind that this might alter the nutritional value and overall taste, making it sweeter and less complex. If you’re following a specific diet, always check the labels to ensure they align with your goals.
How should I store my homemade chocolates?
To keep your homemade Andes mint chocolates fresh and delicious, store them in an airtight container in a cool, dark place. A pantry or cupboard works great. If you want to prolong their shelf life, consider refrigerating them, but bring them back to room temperature before you indulge to enhance the flavor.
What can I substitute for cacao butter?
If you’re looking to replace cacao butter in your homemade Andes mint chocolates, here are some options:
- Coconut oil: Offers a similar consistency and flavor. Just be mindful that it may affect the final texture.
- Shea butter: A great vegan choice that provides a creamy texture, but it has a distinct taste that might alter your chocolates’ flavor profile.
- Vegetable shortening: It’s not as natural but can yield similar results if you’re in a pinch.
Feel free to experiment and find what best suits your palate! When making your homemade Andes mint chocolates, remember that each ingredient can change the final outcome, so enjoy the journey of discovery. For more tips on ingredient substitutions, check out this resource.
Conclusion on Homemade Andes Mint Chocolates
Emphasizing Simplicity and Deliciousness
Creating your own homemade Andes mint chocolates is not only a fun kitchen project, but it also allows you to enjoy a classic treat tailored to your dietary preferences. With just a few simple ingredients, you can whip up these delightful chocolates in no time.
Imagine indulging in rich chocolate with that refreshing minty bite, all while knowing exactly what’s inside. It’s the perfect blend of convenience and taste! Plus, you can impress friends at gatherings or simply treat yourself after a long day. If you’re curious about more healthy alternatives, check out sites like Healthline for nutritional insights. Happy chocolate-making!
PrintHomemade Andes Mint Chocolates: Indulgent Treats for Everyone

Homemade Andes Mint Chocolates are the perfect indulgent treats that cater to everyone’s dietary preferences, including paleo, keto, and vegan diets.
- Prep Time: 10 minutes
- Cook Time: 40 minutes
- Total Time: 50 minutes
- Yield: 16 pieces
- Category: Desserts
- Method: No-Bake
- Cuisine: American
- Diet: Vegan, Keto, Paleo
Ingredients
- 1 cup almond flour
- 1/4 cup cocoa powder
- 1/2 cup coconut oil
- 1/4 cup maple syrup
- 1 teaspoon peppermint extract
- 1/4 teaspoon salt
- 1/2 cup dark chocolate chips
Instructions
- In a mixing bowl, combine almond flour, cocoa powder, and salt.
- Melt coconut oil and stir in maple syrup and peppermint extract.
- Mix wet ingredients into the dry ingredients until well combined.
- Press the mixture into a lined baking dish and freeze for 20 minutes.
- Melt dark chocolate chips and pour over the chilled mixture, spreading evenly.
- Return to the freezer for another 20 minutes, then cut into squares.
Notes
- For a richer chocolate flavor, use high-quality dark chocolate.
- Store leftovers in an airtight container in the fridge.
Nutrition
- Serving Size: 1 piece
- Calories: 120
- Sugar: 6g
- Sodium: 30mg
- Fat: 10g
- Saturated Fat: 5g
- Unsaturated Fat: 4g
- Trans Fat: 0g
- Carbohydrates: 10g
- Fiber: 2g
- Protein: 2g
- Cholesterol: 0mg