Introduction to Dirt Cake Recipe
What is dirt cake and why it’s a delicious dessert?
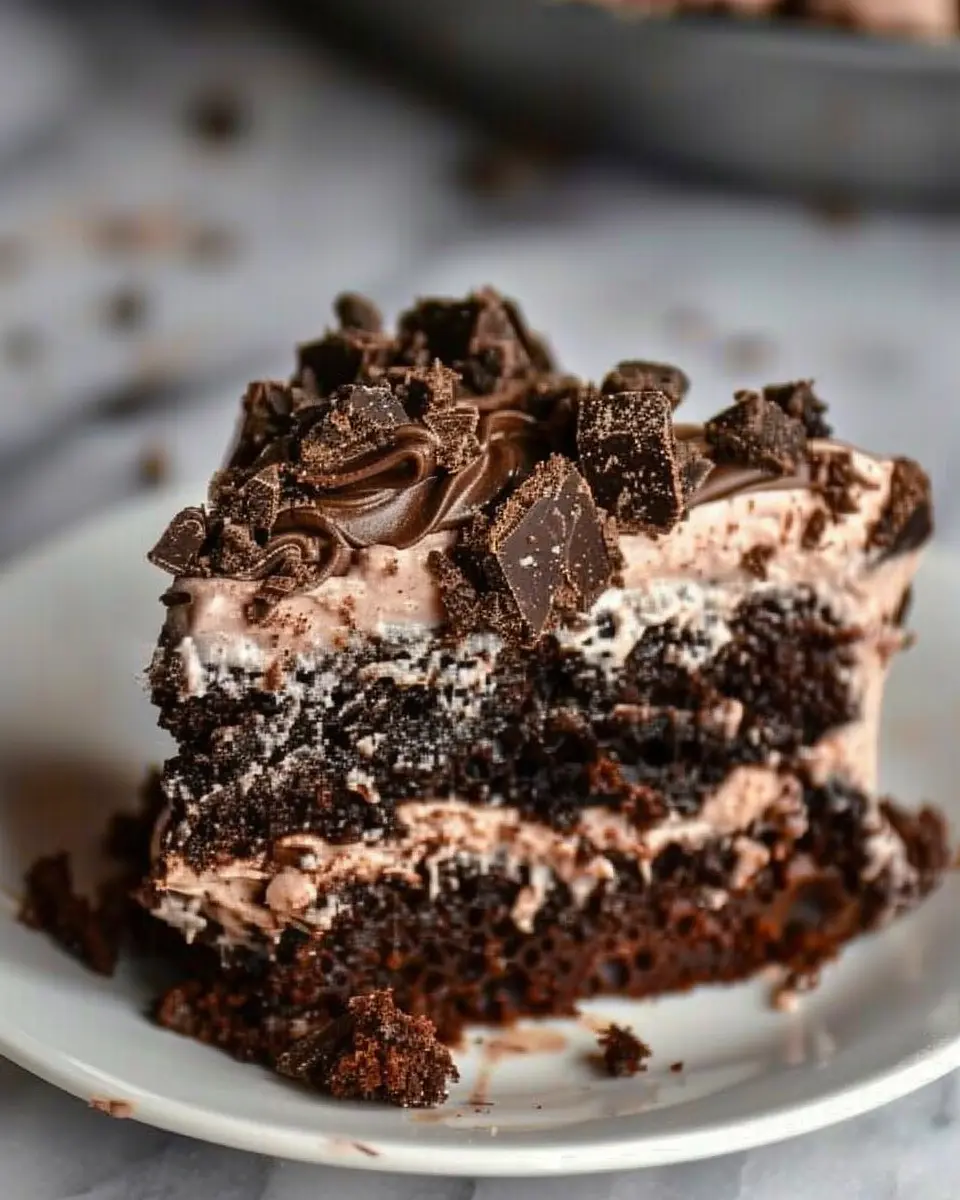
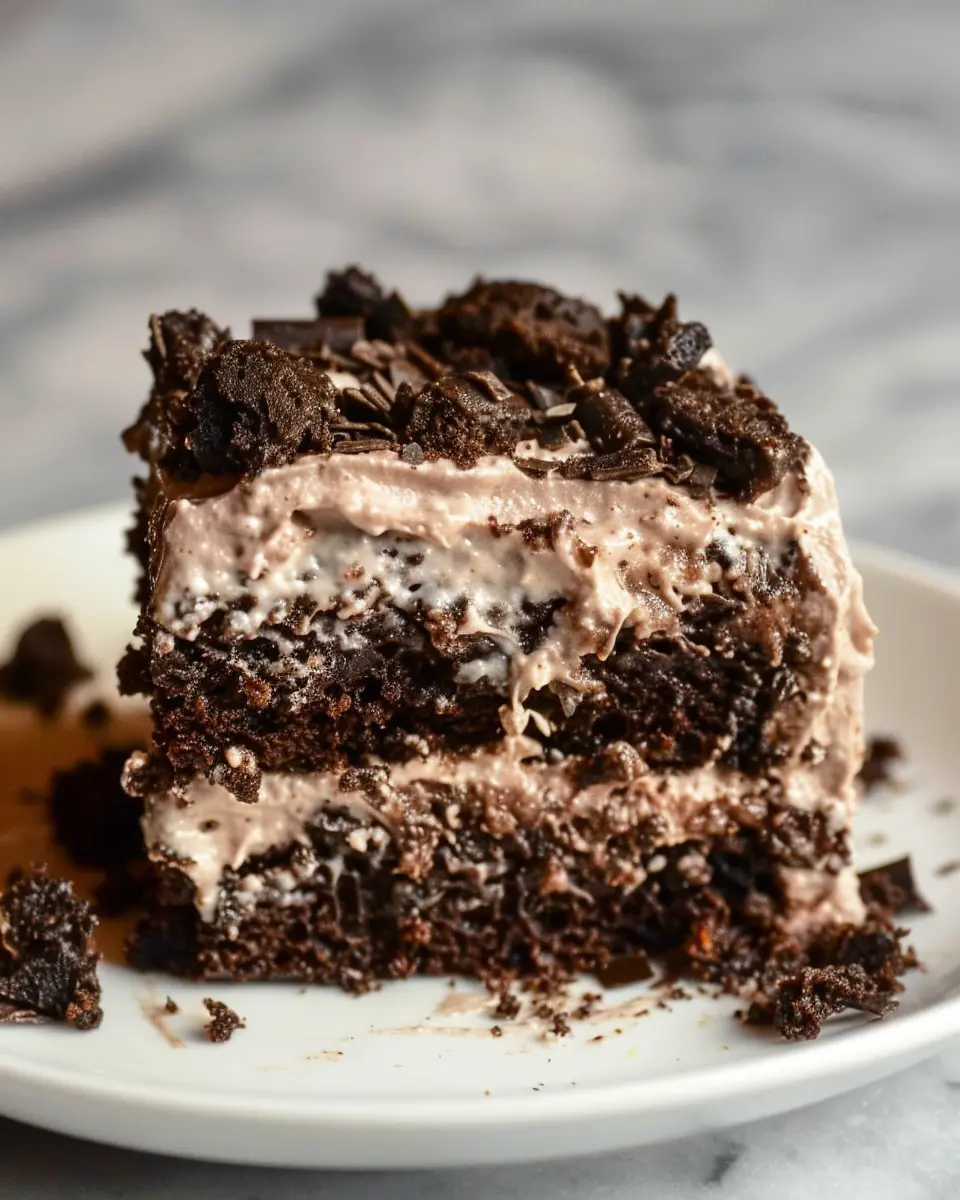
Ah, dirt cake! If you haven’t experienced this whimsical dessert yet, you’re in for a treat. At its core, dirt cake is a delightful concoction made primarily of crushed chocolate sandwich cookies, layers of rich, creamy pudding, and topped with gummy worms or other fun decorations. It’s not your typical dessert; rather, it’s a playful take that combines a visually appealing look with satisfying flavors, making it a hit at gatherings, parties, or even just a cozy night in.
So why does this dirt cake recipe stand out as such a beloved dessert? For starters, it’s incredibly versatile. You can customize it to fit various themes or preferences, whether you want to keep it classic or experiment with flavors. Imagine serving this at a summer barbeque or a child’s birthday party — it instantly becomes the star of the dessert table! Plus, it’s an easy no-bake treat, perfect for those of us who aren’t the most skilled bakers.
The nostalgia of dirt cake: A trip down memory lane
For many, dirt cake is more than just a dessert; it’s a nostalgic reminder of childhood. I still remember the first time I indulged in this delightful creation at a friend’s birthday party. The laughter, the fun, and the sheer joy of digging into that ‘dirt’ made it unforgettable. As we gobbled up spoonfuls of layers, we were only too happy to be covered in crumbs.
There’s something magical about dessert that encapsulates memories and evokes feelings. According to a study by the Food & Brand Lab at Cornell University, memories tied to flavor are often more vivid and impactful than other types of memories. So, every time you whip up a dirt cake, you’re not just making a dessert; you’re also creating new memories. You can find more insights on this connection between food and nostalgia in articles from trusted sources like Psychology Today or The Guardian.
With its playful appearance and ease of preparation, this dirt cake recipe beautifully marries fun and nostalgia. Whether you’re reminiscing about your childhood or starting new traditions, dirt cake has a special place in many hearts and stomachs!
Ingredients for Dirt Cake
Creating a delicious dirt cake recipe starts with the right ingredients. Here’s everything you need to whip up this fun, nostalgic dessert that’s sure to impress at any gathering.
Essential Ingredients for the Cake Layer
- Chocolate sandwich cookies: These are the key to that rich, chocolatey flavor and crumbly texture.
- Butter: Adds richness and helps bind the cookie crumbs for that classic cake layer.
Ingredients for the Pudding Layers
- Instant chocolate pudding mix: This creates the creamy, velvety texture that we all love.
- Milk: Whole milk is best for a rich flavor, but you can opt for alternatives if desired.
- Cream cheese: Softened cream cheese adds depth and a touch of tanginess.
Topping Ingredients to Make it Spectacular
- Whipped topping: Lightens up the dessert and adds a fluffy layer on top.
- Gummy worms: These not only enhance the theme but also add a little fun, especially for kids and the young at heart!
- Crushed cookies: Sprinkling more crushed cookies on top mimics the look of dirt—fun and tasty!
Ready to get started? Check out more on dessert layers from Serious Eats for expert tips!
Preparing the Dirt Cake
Making a dirt cake is one of the most delightful experiences in the kitchen. It’s that nostalgic dessert that takes us back to childhood parties, where kids and adults alike would dig into its chocolaty goodness. Let’s jump into the steps for this fantastic dirt cake recipe so you can impress friends and family at your next gathering!
Baking the Chocolate Cake
First things first—your base layer starts with a soft, moist chocolate cake. You can bake your favorite chocolate cake or use a store-bought mix to save time. Here’s a quick guide if you’re going the homemade route:
- Ingredients: Flour, cocoa powder, sugar, baking powder, baking soda, salt, eggs, milk, vegetable oil, and vanilla extract.
- Instructions:
- Preheat your oven to 350°F (175°C).
- Grease and flour two 9-inch round cake pans.
- In a bowl, mix the dry ingredients together before adding in the wet ones.
- Blend until smooth, pour into pans, and bake for 30-35 minutes until a toothpick comes out clean.
Once your cakes are done, let them cool completely. This step is crucial to ensure your dirt cake layers hold their shape when assembled.
Creating the Fudgy Filling
Now that your cake is cooling, it’s time to whip up the fudgy filling. This delight will elevate your dirt cake recipe from mere dessert to an unforgettable treat.
- Ingredients: Cream cheese, powdered sugar, and whipped topping.
- Instructions:
- In a large bowl, beat cream cheese until smooth.
- Gradually add powdered sugar and mix until fully incorporated.
- Fold in your whipped topping gently so it maintains a light texture.
This fudgy filling is nothing short of a treat on its own—just try not to eat it all before it makes it into the cake!
Making the Chocolate Pudding Layer
Chocolate pudding may sound simple, but its creamy richness plays a pivotal role in your dirt cake. Here’s how to master it:
- Ingredients: Instant chocolate pudding mix and milk.
- Instructions:
- Combine the pudding mix and milk in a bowl.
- Whisk for about 2 minutes until thickened.
- Refrigerate for a few minutes until it’s nice and cold.
This luxurious layer is what gives your dirt cake its signature charm. It’s creamy and dreamy—who can resist?
Assembling the Layers
Once everything is prepared, it’s time to assemble this layered masterpiece. Here’s how to build it:
- Layer One: Start with a layer of chocolate cake at the bottom of a trifle dish or large glass bowl.
- Layer Two: Spread half of the fudgy filling on top of the cake layer.
- Layer Three: Spoon half of the chocolate pudding over the fudgy layer.
- Repeat the layers: Place another layer of the chocolate cake, followed by the remaining fudgy filling and chocolate pudding.
It’s visually satisfying to watch the layers come together—it almost feels like art!
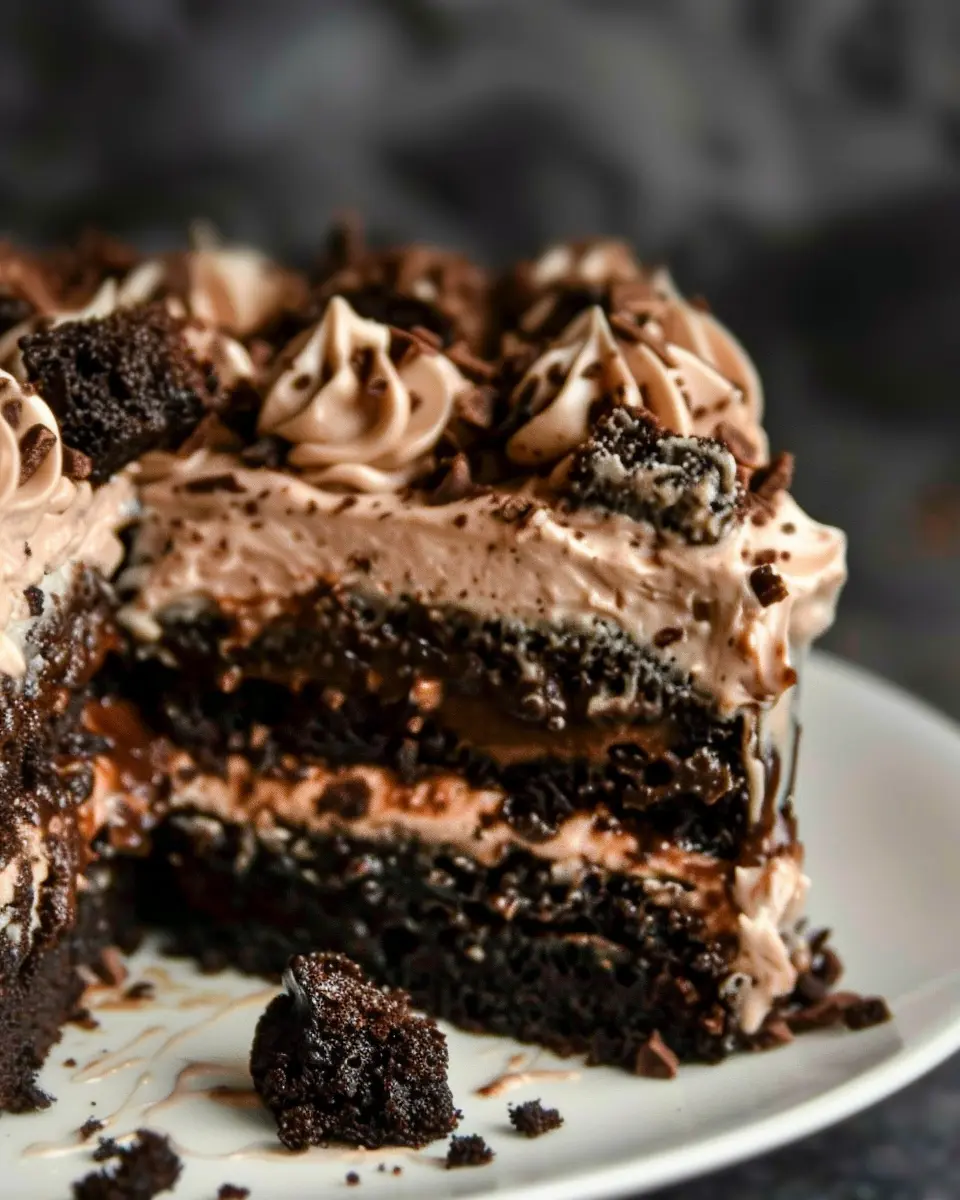
Adding the Signature Crunchy Topping
No dirt cake is complete without a crunchy topping that mimics actual dirt. For this, we’ll use crushed Oreos or chocolate cookies.
- Instructions:
- Crush the cookies into small pieces (you can use a food processor for this).
- Evenly sprinkle the cookie dust over the top pudding layer.
- Optional: Decorate with gummy worms for a fun, whimsical touch!
This signature topping contrasts beautifully with the creamy layers, making every bite a delicious adventure.
Now that you’ve prepared your dirt cake, just let it chill in the refrigerator for a few hours (or longer!) to let all the flavors meld together. You’ll want to savor every decadent bite of this delightful dessert! If you’re ever looking for additional inspiration, consider checking the Joy of Baking or similar resources for more cake ideas and baking techniques.
Happy baking!
Variations on Dirt Cake
When it comes to dirt cake, there are plenty of ways to mix things up. Whether you have dietary restrictions or just want to try something new, these variations will elevate your classic dirt cake recipe and make it perfect for any occasion.
Gluten-free dirt cake options
For those following a gluten-free diet, you don’t have to miss out on this decadent treat. Simply swap out regular chocolate sandwich cookies for gluten-free versions, which are widely available at most grocery stores. Also, check to ensure your pudding mix is gluten-free. There are even recipes that use a combination of crushed nuts or gluten-free graham crackers for a delightful crunch.
Vegan adaptations for dirt cake
If you’re exploring a vegan lifestyle, don’t worry—your dirt cake recipe can easily adapt! Use coconut cream or dairy-free whipped topping instead of regular whipped cream. Replace the milk in your pudding with almond or oat milk, and use a dairy-free chocolate sandwich cookie for that classic taste. This completely changes the texture while keeping it delicious!
Fun flavor twists: mint, caramel, and more
Feeling adventurous? Try adding a twist to your dirt cake with these flavor options:
- Mint: Add a few drops of mint extract to your pudding for a refreshing surprise.
- Caramel: Drizzle caramel sauce between layers for a sweet, gooey treat.
- Peanut Butter: Mix creamy peanut butter into the pudding for a nutty flavor that pairs wonderfully with chocolate.
The possibilities are endless! Exploring variations of your favorite dirt cake recipe could lead to a whole new family favorite.
If you want to dive deeper into gluten-free and vegan ingredients, check out the Gluten-Free & Vegan Recipe Archives for more inspiration. Happy baking!
Cooking Tips and Notes for Dirt Cake
Common Pitfalls to Avoid
When whipping up your dirt cake, it’s easy to make a few rookie mistakes. First, don’t rush the mixing process—properly blending your ingredients ensures a creamier texture. Another pitfall? Overcooling your pudding! Make sure it’s just thickened; too cold can lead to clumping. Check out this guide for more about pudding textures here.
How to Store Leftovers Properly
To keep your dirt cake delicious, store leftovers in an airtight container in the refrigerator. This keeps it fresh and prevents it from drying out. If you plan to store it for more than a couple of days, consider separating the layers before refrigerating to maintain texture.
Your Secret Weapon: Enhancing Flavors
Want to elevate your dirt cake recipe? Consider adding a splash of vanilla extract or a hint of almond flavor for an unexpected twist. Additionally, incorporating finely crushed chocolate cookies or even a sprinkle of coffee grounds can deepen the flavor profile. Remember, the key is to balance the flavors, so taste as you go!
Serving suggestions for Dirt Cake
Perfect occasions for serving dirt cake
The dirt cake recipe is a playful dessert that brings a bit of nostalgia and fun to various occasions. It’s perfect for:
- Birthday parties: Kids and adults alike love the whimsical touch!
- Picnics and outdoor gatherings: Its sturdy structure makes it easy to transport.
- Themed events: Think garden parties or Halloween—it’s a conversation starter!
Pairing dirt cake with beverages
When it comes to beverages, consider options that balance the sweetness of the cake. Here are a few ideas:
- Iced tea: A refreshing choice, especially in warmer weather.
- Milk or chocolate milk: Classic pairings that complement the chocolate flavor.
- Sparkling lemonade: The tartness can be a delightful contrast to the sweetness.
Explore more about perfect drink pairings on The Spruce Eats.
Creative serving ideas and presentation tips
To elevate your dirt cake, think about innovative serving techniques:
- Individual cups or jars: These are not only cute but also make serving easier. Plus, they look great!
- Layered displays: Use clear containers to showcase the cake’s layers, making it visually delightful.
- Garnish with edible flowers or mint leaves: Adds a pop of color and freshness.
Incorporating personal touches can make serving this dirt cake recipe even more special.
Time Breakdown for Dirt Cake
Preparation Time
Getting your hands dirty in the kitchen is part of the fun with this dirt cake recipe! You’ll need about 20 to 30 minutes to gather your ingredients and prep everything. It’s simple—just crush those cookies and mix your creamy ingredients until it’s dreamy. Don’t forget to have fun; it’s a great way to unwind after a busy day.
Baking and Cooling Time
Surprisingly, there’s no baking involved in this dirt cake! That’s right—just let it chill in the fridge for a couple of hours. This cooling period helps meld those delicious flavors together, making every spoonful a delightful experience.
Total Time Needed to Make Dirt Cake
All in all, you’re looking at roughly 3 hours from start to finish—most of that time is just letting it chill! It’s perfect for a last-minute dessert or for planning ahead for a gathering. Want to impress your friends? This dirt cake recipe is not only simple but also a real crowd-pleaser. Check out more tips on making desserts here and elevate your sweet game!
Nutritional Facts for Dirt Cake
Calories and Serving Size
If you’re diving into a dirt cake recipe, you might be curious about what you’re indulging in. A standard serving of dirt cake typically contains about 300 calories, making it a rich dessert. However, the size of your slice can make a significant difference, so remember that moderation is key.
Macronutrient Breakdown
In each serving, you can expect a delightful blend of macronutrients:
- Fats: Approximately 10g, largely from cream cheese and butter.
- Carbohydrates: Around 45g, primarily from crushed cookies and sugar.
- Protein: About 3g, sourced from cream cheese.
For those mindful of their sugar intake, it’s worth noting that dirt cake contains a fair amount of added sugars, so enjoy it as an occasional treat rather than a daily staple.
Any Dietary Concerns?
While dirt cake is a beloved favorite, there are a few dietary considerations:
- Allergens: It typically contains dairy and gluten, so if you’re lactose intolerant or gluten-sensitive, you may want to look for alternatives.
- Sugar Content: Given the dessert’s sweetness, those watching their sugar intake might want to savor it in small portions.
For a deeper dive into sugar’s effects, check out resources from the American Heart Association.
Next time you’re whipping up this classic dessert, keep these nutritional facts in mind to enhance your enjoyment and sharing of your favorite dirt cake recipe!
FAQs about Dirt Cake
Dirt cake is a delightful dessert that never fails to impress at parties and family gatherings. If you have questions about crafting this fun treat, you’re in the right place. Let’s dive into some frequently asked questions!
Can I use substitutions in the dirt cake recipe?
Absolutely! One of the joys of making a dirt cake is its flexibility. You can easily swap out ingredients based on your preferences or dietary needs. For example, if you’re avoiding dairy, you can opt for dairy-free cream cheese or whipped topping. Additionally, gluten-free chocolate sandwich cookies are a great alternative if you’re avoiding gluten. Don’t hesitate to get creative and adjust the recipe to fit your taste!
What’s the best way to decorate my dirt cake?
Decorating your dirt cake can be a fun and creative process. Some popular ideas include:
- Using gummy worms for that classic “dirt” effect.
- Adding edible flowers for a beautiful contrast.
- Using crushed chocolate cookies to create the realistic dirt layer.
- Sprinkling edible glitter for a magical touch.
Personalize your cake with touches that reflect the season or event, like mini pumpkins for Halloween or fresh fruit in the summer.
How long does dirt cake last in the fridge?
When stored properly in an airtight container, your dirt cake can last up to 5 days in the fridge. Just keep in mind that the texture may change slightly, so it’s best enjoyed fresh. If you want to make it ahead of time, consider preparing the layers separately and assembling it just before serving for the best texture and flavor.
For more tips on food storage, check out the USDA’s official guidelines on food safety here. Enjoy your delicious creation!
Conclusion on Dirt Cake Recipe
Final thoughts on making dirt cake
Making a delightful dirt cake is not just about following steps, but about creating moments. The blend of rich chocolate pudding, crushed cookies, and soft cream cheese is perfect for any occasion. Think about how the kids will giggle at the surprise of gummy worms, or how your friends will reminisce about childhood treats as they enjoy every bite. This dessert is as much about fun as it is about flavor!
Encouragement to try it yourself and share!
I encourage you to give this fantastic dirt cake recipe a try. It’s an excellent way to connect with friends and family, plus it’s a breeze to whip up! Once you’ve perfected it, don’t forget to share your creation on social media and tag your favorite cooking sites. Your unique touch might inspire someone else to make their own version!
PrintDirt Cake Recipe: The Best Indulgent Treat for Family Fun
Enjoy this indulgent dirt cake recipe that promises fun for the entire family.
- Prep Time: 20 minutes
- Cook Time: 0 minutes
- Total Time: 1 hour 20 minutes
- Yield: 8 servings
- Category: Dessert
- Method: No bake
- Cuisine: American
- Diet: Vegetarian
Ingredients
- 1 package chocolate sandwich cookies
- 1 cup unsalted butter
- 1 package cream cheese
- 1 cup powdered sugar
- 3 cups whipped topping
- 2 cups milk
- 1 package instant chocolate pudding mix
Instructions
- Crush the chocolate sandwich cookies and set aside.
- In a bowl, beat together the butter, cream cheese, and powdered sugar until smooth.
- Fold in the whipped topping.
- In another bowl, whisk together the milk and pudding mix until thick.
- Combine the pudding mixture with the cream cheese mixture.
- In a serving dish, layer the pudding mixture and crushed cookies alternately, finishing with cookies on top.
- Refrigerate for at least 1 hour before serving.
Notes
- This dessert is great for parties and can be decorated with gummy worms for effect.
- Variations can include using vanilla pudding or adding chocolate shavings.
Nutrition
- Serving Size: 1 cup
- Calories: 350
- Sugar: 25g
- Sodium: 200mg
- Fat: 25g
- Saturated Fat: 15g
- Unsaturated Fat: 5g
- Trans Fat: 0g
- Carbohydrates: 35g
- Fiber: 1g
- Protein: 3g
- Cholesterol: 50mg