Introduction to 7 Layer Bars
When it comes to time-honored desserts, 7 Layer Bars certainly evoke a wave of nostalgia for many. You might recall coming home from school to find these colorful treats cooling on the kitchen counter, with each layer beckoning for your attention. With their combination of buttery crust, sweetened condensed milk, and a medley of toppings, they can transform any gathering from routine to memorable. The simplicity of these bars doesn’t just make them a hit with the taste buds; they also bring back memories of family gatherings, bake sales, and lazy weekends. If you’re looking to recapture that warm, fuzzy feeling, there’s nothing quite like whipping up a batch of these delightful treats.
For young professionals navigating the bustling landscape of work-life balance, 7 Layer Bars shine as an ideal dessert option. Why, you ask? Well, in addition to being incredibly easy to make, these bars encapsulate a divine blend of flavors and textures that cater to a diverse palate. Preparing them requires minimal time—perfect for those post-work evenings when you want a sweet escape without the fuss of elaborate cooking.
Convenience Meets Flavor
Here’s the best part! You can create these bars using ingredients that are usually on hand or easily accessible. A few pantry staples like graham crackers, chocolate chips, nuts, and coconut, paired with a can of sweetened condensed milk, can quickly be transformed into a crowd-pleaser. Being able to satisfy your sweet tooth without added stress makes 7 Layer Bars the ultimate go-to dessert for potlucks, movie nights, or even just a well-deserved treat to enjoy on your own.
Shareable and Versatile
Also, 7 Layer Bars are incredibly versatile. You can swap out toppings or add your personal twist, ensuring they reflect your unique taste. This adaptability makes them even more appealing for young professionals who appreciate a good recipe that can adapt to different occasions and culinary preferences. Whether you’re in the mood for a nutty crunch or a more fruity flavor, the possibilities are nearly endless.
So, whether you’re reminiscing about childhood or just want a delightful dessert, 7 Layer Bars could be your next kitchen experiment. Are you ready to dive into this delicious journey? Let’s find out how to make these magic cookie bars shine!
Feel free to check out Spruce Eats for more variations and topping ideas that can inspire your own 7 Layer Bars creation.
Ingredients for 7 Layer Bars
Essential components
If you’re ready to whip up some delicious 7 Layer Bars, you’ll need a handful of essential ingredients. Here’s a quick overview to get you started:
- Graham cracker crumbs: These form the crust, providing that delightful crunch.
- Unsweetened shredded coconut: Adds texture and a subtle sweetness.
- Sweetened condensed milk: The magic ingredient that binds everything together.
- Semi-sweet chocolate chips: A must-have for that rich chocolate flavor.
- Butterscotch chips: They provide a unique sweetness that pairs perfectly with chocolate.
- Chopped nuts: Walnuts or pecans add a satisfying crunch.
- Butter: Just a bit for that perfect crust texture.
Optional add-ins for your twist
Feeling adventurous? Customize your 7 Layer Bars with these fun add-ins:
- Dried fruits: Raisins or cranberries can elevate your bars with a tart contrast.
- Peanut butter: A drizzle can add a creamy richness.
- Cinnamon: A sprinkle can enhance the flavor profile beautifully.
Experimenting with these optional add-ins might just make your bars a hit at your next gathering! Check out more variations on delicious desserts at sources like Taste of Home or AllRecipes.
Step-by-step preparation of 7 Layer Bars
Creating 7 Layer Bars, also known as magic cookie bars, is not just about baking; it’s about assembling a mouthwatering masterpiece that can delight your taste buds and impress friends. These bars are layered with an irresistible mix of flavors, and I’m here to guide you through each step, ensuring you’re set up for success in the kitchen.
Prepare the base
The foundation of your 7 Layer Bars starts with a simple and buttery crust. For this, you will typically need:
- 1 ½ cups of graham cracker crumbs
- ½ cup of unsweetened shredded coconut (toasted if you like a nuttier flavor)
- ½ cup of unsalted butter, melted
- ½ cup of brown sugar for that extra depth of sweetness
- Preheat your oven to 350°F (175°C). This ensures that your bars cook evenly throughout.
- Line an 8×8 inch baking pan with parchment paper, leaving some overhang. This will make it super easy to lift your bars out later.
- In a mixing bowl, combine the graham cracker crumbs, melted butter, and brown sugar. Stir well until combined—this should resemble damp sand.
- Press this mixture evenly into the prepared pan, creating a solid layer. Using the back of a measuring cup can help with this, ensuring a firm crust.
You’ve laid the groundwork for those 7 Layer Bars; now, let’s move on to the fun part—layering in all the goodies!
Layer the goodies
Here’s where you can really get creative with your ingredients. The legendary combination usually includes:
- 1 cup of semi-sweet chocolate chips
- 1 cup of butterscotch chips
- 1 cup of chopped nuts (like walnuts or pecans)
- 1 cup of sweetened shredded coconut (if you love coconut, add a bit more as a double layer!)
- 1 can (14 ounces) of sweetened condensed milk
- Sprinkle the chocolate chips evenly over your crust, followed by the butterscotch chips. The vibrant colors and textures make this step satisfying and visually appealing.
- Next, add the chopped nuts and then the coconut. Don’t rush this process; taking the time to layer evenly can make a difference in every bite.
- Finally, drizzle the sweetened condensed milk over the top, ensuring all the layers are soaked and sweetened. This magical step is what binds everything together beautifully.
Pour the magic
Ah, here’s the crux of it all—the magic of the 7 Layer Bars! The sweetened condensed milk is a game changer. It’s not just a sweetener; it acts as a glue that melds the various layers into one harmonious dessert.
Ensure you are following these tips:
- Spread the milk evenly to cover as much of the layers as possible.
- Don’t worry if it drips down into the layers; that’s part of the magic!
Bake and cool
Your bars are nearly ready to become a star of the dessert table!
- Place the baking pan in the oven and bake for about 25 to 30 minutes. You want the top to be golden brown and bubbly, giving off that rich aroma that will have everyone circling the kitchen.
- Once done, remove the pan from the oven and let it cool completely on a wire rack. This step is crucial as cooling will allow the layers to set beautifully.
- Once cooled, use the parchment paper overhang to lift the bars out of the pan. Cut them into squares or rectangles depending on your preference.
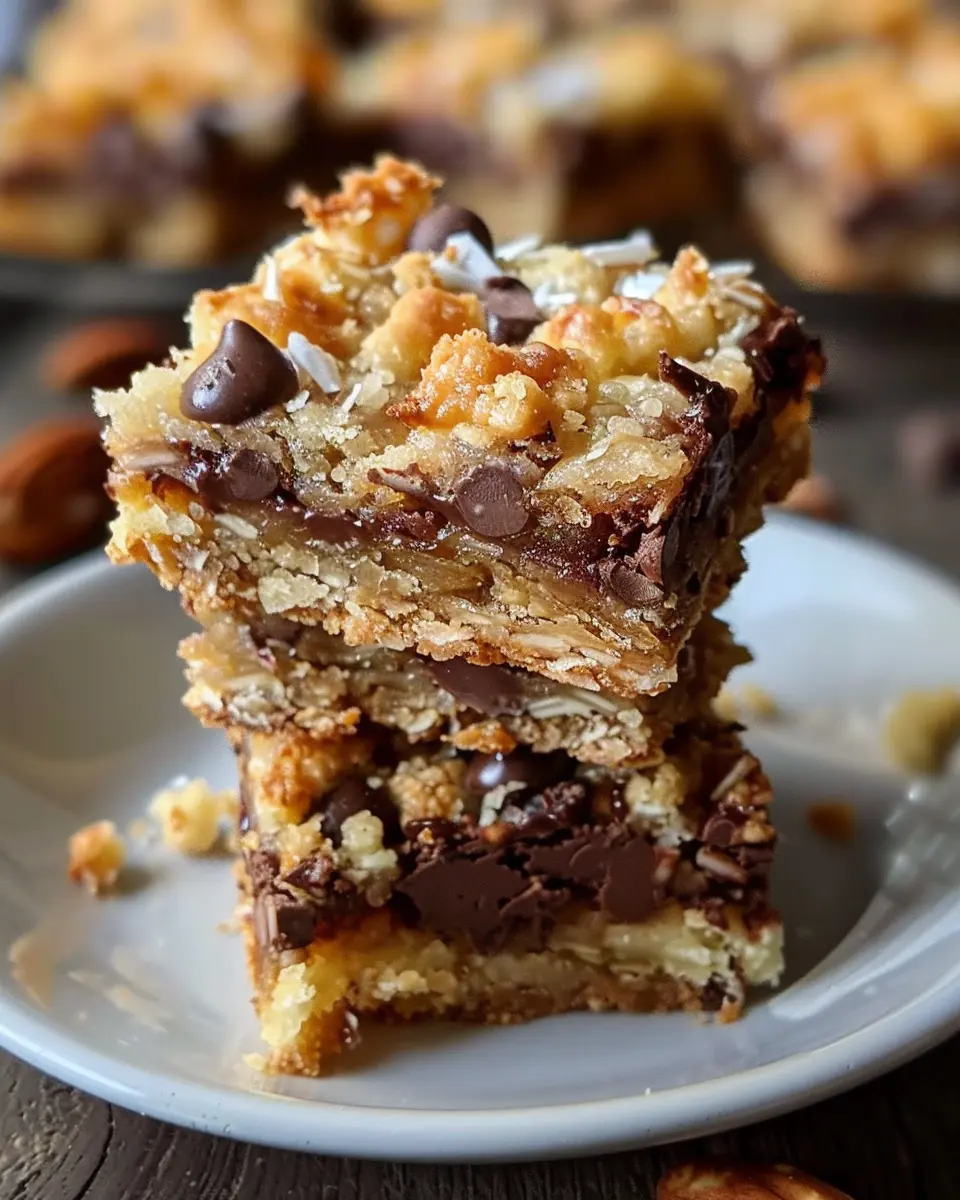
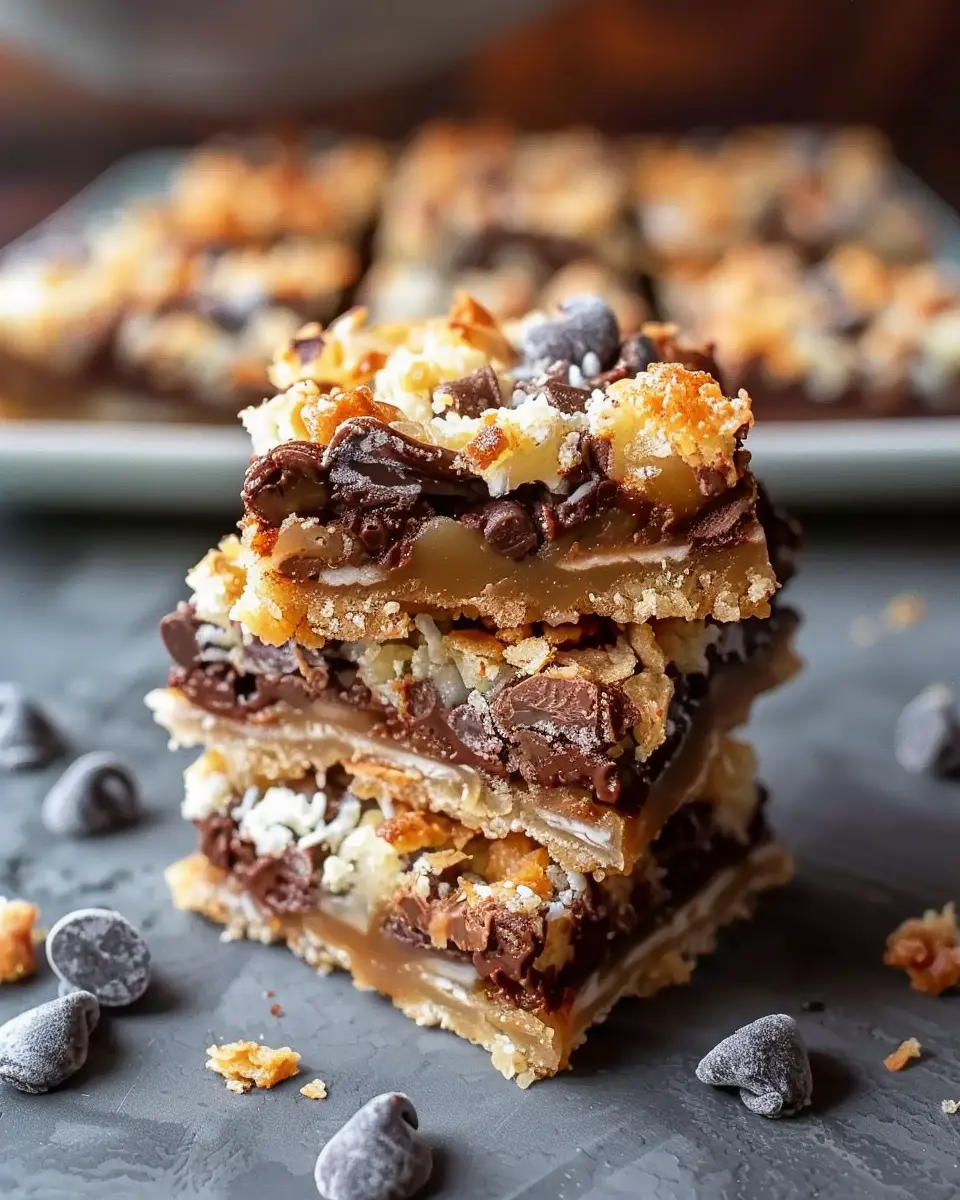
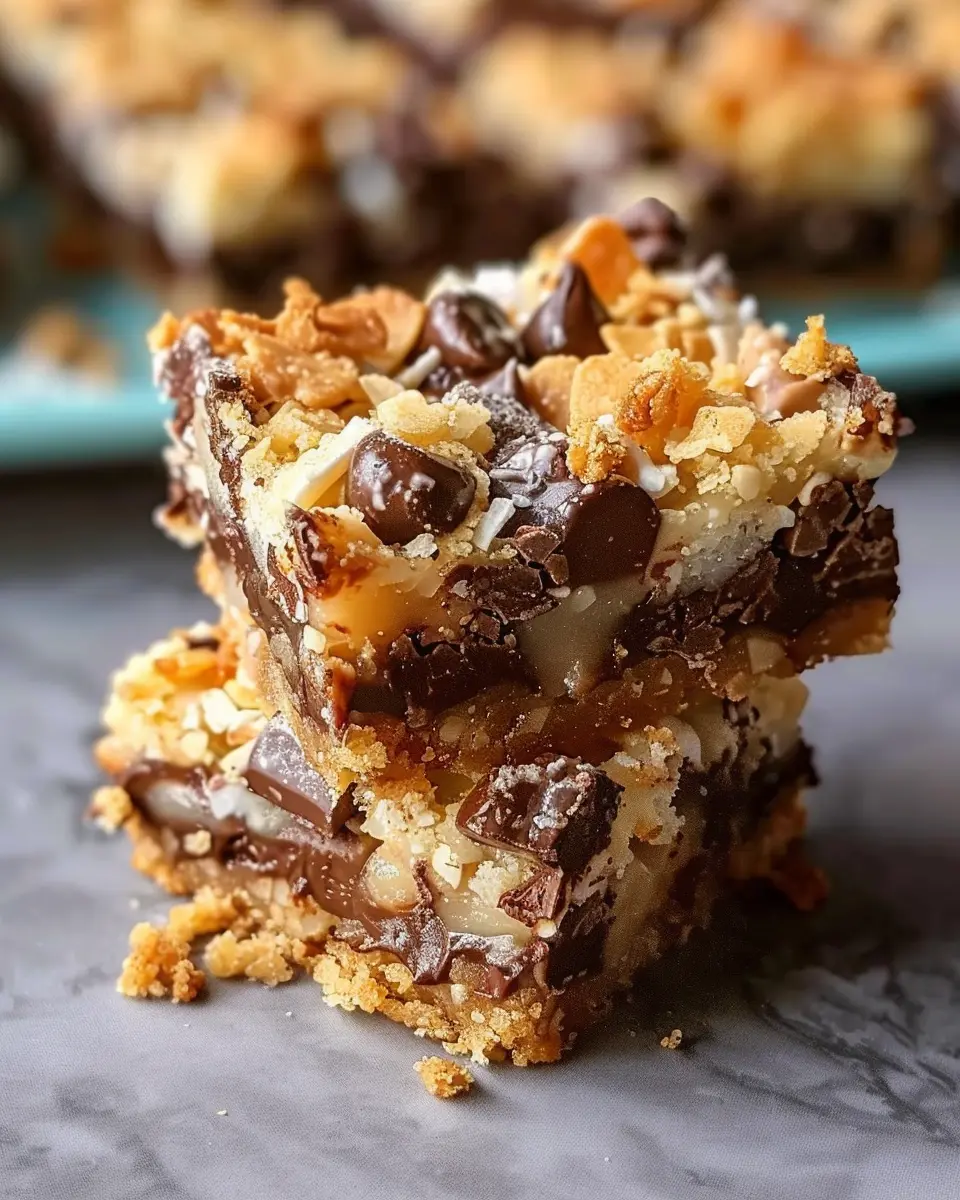
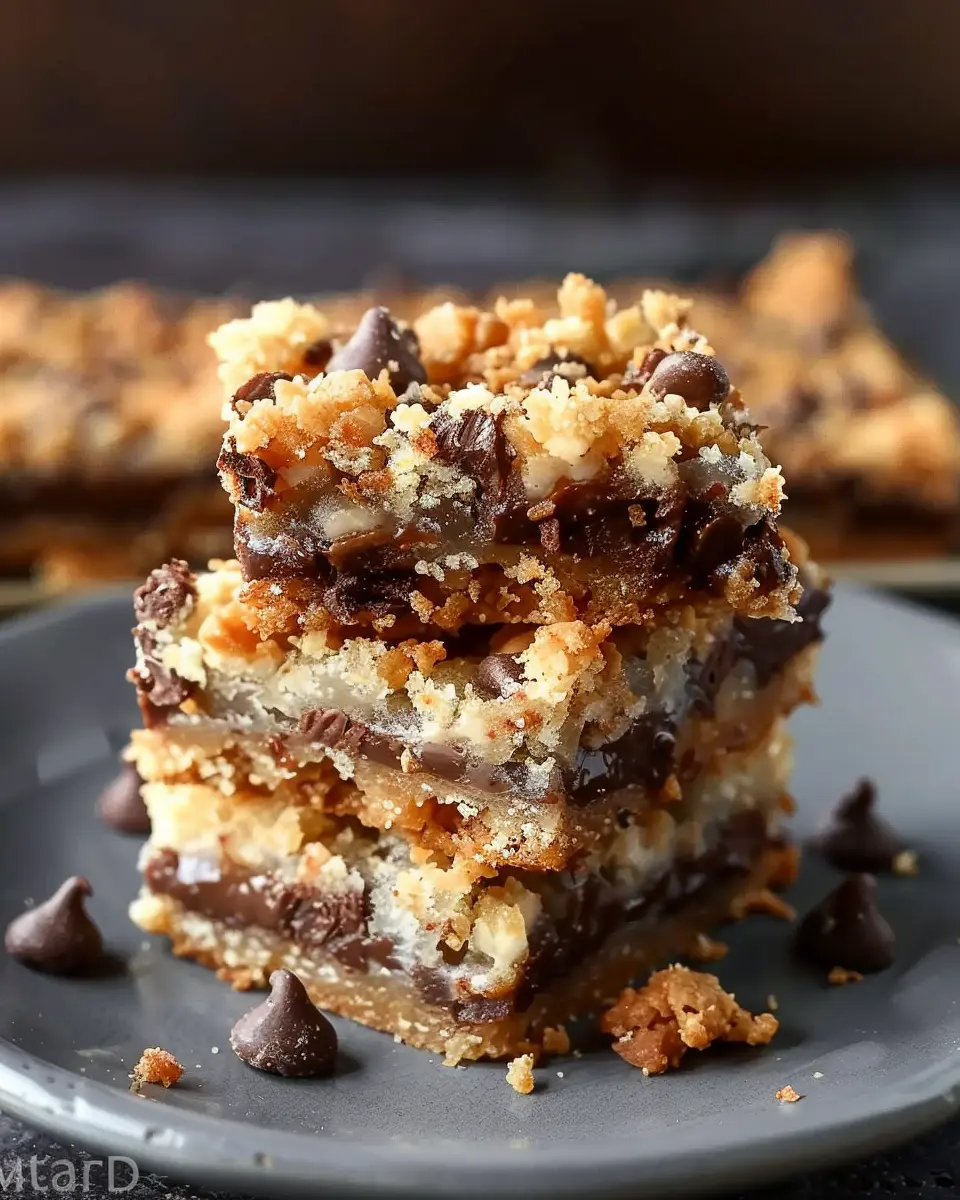
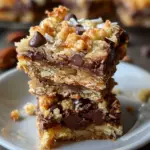
And there you have it—the perfectly layered, sweet, and decadent 7 Layer Bars. These beauties are ready to be shared, enjoyed, and cherished. Don’t forget to grab a glass of milk or your favorite non-alcoholic beverage to pair with this delightful treat!
For more scrumptious dessert ideas, check out Food Network or my favorite baking blogs that dive deep into sweet creations. Your kitchen is about to become the hub of delicious conversations!
Creative variations on 7 Layer Bars
7 Layer Bars, often known as Magic Cookie Bars, are incredibly versatile, allowing for a wealth of variations that cater to different tastes and dietary needs. If you’re ready to elevate your baking game, here are some delightful twists to consider.
Classic chocolate variation
For a rich and indulgent twist, go with the classic chocolate variation. Simply replace some of the coconut with chocolate chips, or mix half chocolate chips and half butterscotch chips for a deeper flavor. The result is a gooey, chocolatey treat that will have friends and family clamoring for more. Try using dark chocolate for a sophisticated touch!
Nut-free alternative
If you or your friends are avoiding nuts, fear not—you can still enjoy these delectable 7 Layer Bars! Substitute nuts with crispy rice cereal or crushed graham crackers for added crunch. If you’re feeling adventurous, a little toasted sunflower seed can provide a nice nutty flavor without the allergens.
Seasonal themes
Why not get into the festive spirit by tailoring your 7 Layer Bars to the season? In the fall, imagine a pumpkin spice version infused with cinnamon and nutmeg. Layer some pumpkin puree and pecans for an autumnal treat! Come winter, you can create a peppermint variant by adding crushed peppermint candies to the chocolate chips. Not only does it taste great, but it also makes your bars look beautifully seasonal.
Experiment with these variations and share them with your loved ones. Baking is all about creativity and joy, so let your imagination run wild. For more inspiration on creative baking, visit American Baking Association or The Joy of Baking. Happy baking!
Cooking Tips and Notes for 7 Layer Bars
Best Practice for Clean Cuts
When it comes to slicing your 7 Layer Bars into perfect squares, the key is patience. Let the bars cool completely in the pan before attempting to cut them. A good trick is to refrigerate them for about an hour; this firms up the layers and can help avoid messy edges. For cleaner cuts:
- Use a sharp knife, and run it under hot water before each slice for smooth edges.
- Wipe the knife clean between cuts to prevent layers from sticking.
Storage Tips
To keep your 7 Layer Bars fresh longer, store them in an airtight container at room temperature for up to a week. If you plan to keep them longer, wrapping them in plastic wrap and placing them in the fridge will help maintain their flavor and texture. You can even freeze these bars; just thaw them in the refrigerator before serving.
For more information on optimal food storage, check out the USDA’s tips on food safety here – it’s a great resource!
By following these tips, you’ll enjoy delightful, gooey 7 Layer Bars whenever the craving strikes!
Serving suggestions for 7 Layer Bars
Pairings with coffee or tea
If you’re looking to elevate your 7 Layer Bars, consider pairing them with your favorite coffee or tea. The rich layers of coconut, chocolate, and butterscotch in these bars contrast beautifully with a smooth cup of dark roast coffee, bringing out the sweetness while balancing flavors. Alternatively, a mild green tea can complement the bars’ delightful textures without overpowering them. For a cozy afternoon treat, try a creamy chai latte; the spices will add an exciting dimension to your dessert experience.
Presentation ideas for gatherings
When hosting friends or family, make your 7 Layer Bars the centerpiece of your dessert table. Cut them into small squares for easy snacking and arrange them on a decorative platter. Consider adding small labels or tags next to the bars highlighting their ingredients. This not only assists guests with allergies but also sparks conversation about everyone’s favorite bar flavors. For a festive touch, you can place a few seasonal decorations around the tray, creating an inviting atmosphere that encourages guests to indulge in these sweet layers. For more inspiration on dessert presentation, check out this guide.
By thoughtfully considering pairings and presentation, your 7 Layer Bars will surely impress your gatherings!
Time breakdown for 7 Layer Bars
When planning to whip up a delightful batch of 7 Layer Bars, it’s helpful to know how much time you’ll need. Here’s a quick breakdown for you:
Preparation time
Get your hands on those delicious ingredients and prep your workspace! You’ll need about 15 minutes to gather everything, melt butter, and layer your ingredients just right.
Baking time
Once you pop those beauties in the oven, it typically takes about 25 minutes to achieve that golden brown perfection. Keep an eye on them to prevent any burning!
Total time
All in, you’re looking at roughly 40 minutes from start to finish. It’s a speedy and satisfying way to create a delightful treat that your friends and family will adore!
For more tips on timing and making the most out of your baking experience, check out this comprehensive baking guide. Happy baking!
Nutritional Facts for 7 Layer Bars
Serving Size
When indulging in these delicious 7 Layer Bars, it’s important to be mindful of the serving size. One typical serving amounts to about one bar, which weighs approximately 60 grams. This portion allows you to enjoy the layers of flavor without overdoing it!
Key Nutrients
These magic cookie bars are not just a delightful treat; they come packed with some nutritional highlights:
- Calories: Roughly 200-250 per bar
- Fat: Approximately 12 grams, including healthy fats from coconut and nuts
- Carbohydrates: Around 30 grams, primarily from the crust and sweetened condensed milk
- Protein: About 3 grams, thanks to the nuts and chocolate chips
While they might not be the healthiest option out there, enjoying a 7 Layer Bar occasionally can definitely satisfy your sweet tooth without too much guilt. For more information on managing your dietary choices, check out resources from the American Heart Association and Harvard Health.
So, how will you enjoy your 7 Layer Bars? Will you share them at a gathering, or keep them all to yourself?
FAQs about 7 Layer Bars
Can I make these bars ahead of time?
Absolutely! 7 Layer Bars are perfect for making ahead of time. In fact, letting them sit for a day allows the flavors to meld beautifully. Just bake, cool, and store them in an airtight container at room temperature. If you’re planning to make them for a specific event, preparing them a day in advance not only saves time but also builds anticipation!
How do I store leftover bars?
To keep your leftover 7 Layer Bars fresh, simply place them in an airtight container. They can usually last up to a week at room temperature. For longer storage, you can freeze them! Slice the bars and wrap them individually in plastic wrap, then store them in a freezer-safe bag or container. When you’re ready to indulge again, just let them thaw at room temperature or pop them in the microwave for a few seconds.
What are some common troubleshooting tips?
If you run into any hiccups while making your 7 Layer Bars, here are a few tips to keep in mind:
-
Too crumbly? This might mean you need more sweetened condensed milk. Make sure to drizzle it evenly over the layers for proper binding.
-
Burnt edges? Consider reducing your oven temperature slightly and keeping a close eye on them during the last 10 minutes or so of baking.
-
Layer separation? Sometimes, layers can separate when cooling. Allow the bars to chill completely before cutting to avoid this issue.
By following these guidelines, you’ll be well on your way to creating the perfect batch of 7 Layer Bars! Curious about more baking tips? Consider checking out resources like King Arthur Baking for expert advice.
Conclusion on 7 Layer Bars
Celebrate Homemade Goodness
When it comes to sweet treats, 7 Layer Bars hold a special place. These delightful desserts combine multiple layers of flavors, creating a perfect harmony that’s sure to please everyone. Each bite offers a unique texture, from the crunchy crust to the gooey middle, making them an instant favorite at any gathering.
Embracing homemade creations like this not only satisfies your taste buds but also brings folks together. Plus, making them from scratch gives you full control over the ingredients, letting you personalize each layer. So, the next time you’re in the mood for a treat, remember the joy of baking these magical bars. For more inspiration and variations, don’t forget to check out resources like The Kitchn for creative twists!
Print7 Layer Bars: Indulgent Magic Cookie Bars for Every Home Chef
These 7 layer bars, also known as magic cookie bars, combine rich flavors and textures for a decadent treat that’s easy to make. Perfect for any occasion!
- Prep Time: 20 minutes
- Cook Time: 30 minutes
- Total Time: 50 minutes
- Yield: 24 bars
- Category: Dessert
- Method: Baking
- Cuisine: American
- Diet: Vegetarian
Ingredients
- 1 ½ cups graham cracker crumbs
- 1 cup unsweetened shredded coconut
- 1 cup semi-sweet chocolate chips
- 1 cup butterscotch chips
- 1 can (14 ounces) sweetened condensed milk
- ½ cup chopped nuts (optional)
- ½ cup melted butter
Instructions
- Preheat the oven to 350°F (175°C).
- In a mixing bowl, combine the graham cracker crumbs and melted butter, then press the mixture into the bottom of a greased 9×13 inch baking pan.
- Layer the sweetened condensed milk over the crust, followed by the coconut, chocolate chips, butterscotch chips, and nuts if using.
- Bake for 25-30 minutes, or until the top is golden brown.
- Let cool completely before cutting into bars.
Notes
- For a twist, try adding your favorite candy or dried fruits.
- Make sure to use fresh ingredients for the best flavor.
Nutrition
- Serving Size: 1 bar
- Calories: 180
- Sugar: 12 grams
- Sodium: 50 milligrams
- Fat: 9 grams
- Saturated Fat: 5 grams
- Unsaturated Fat: 3 grams
- Trans Fat: 0 grams
- Carbohydrates: 23 grams
- Fiber: 1 gram
- Protein: 2 grams
- Cholesterol: 10 milligrams