Introduction to Crusty Italian Bread
Why homemade bread is a game-changer for young professionals
If you’re a young professional navigating the hustle and bustle of modern life, cooking might be the last thing on your mind after a long workday. However, making your own bread, especially a crusty Italian bread, can be a true game changer. There’s nothing quite like the scent of fresh bread filling your home, which can instantly uplift your mood and create a warm, inviting atmosphere. Plus, homemade bread not only saves you money compared to store-bought options but also allows you to control ingredients, making it a healthier choice.
Think about it: kneading dough can be a fantastic stress-reliever, giving you a break from screens and endless emails. Not to mention, impressing friends and colleagues with a delicious, homemade loaf during a casual gathering or potluck can elevate your hosting game. Who wouldn’t want to show off their baking skills while sharing your love for homemade nourishment? If you’re interested in learning more about the benefits of making your own bread, check out this informative article.
The allure of crusty Italian bread: An Italian classic
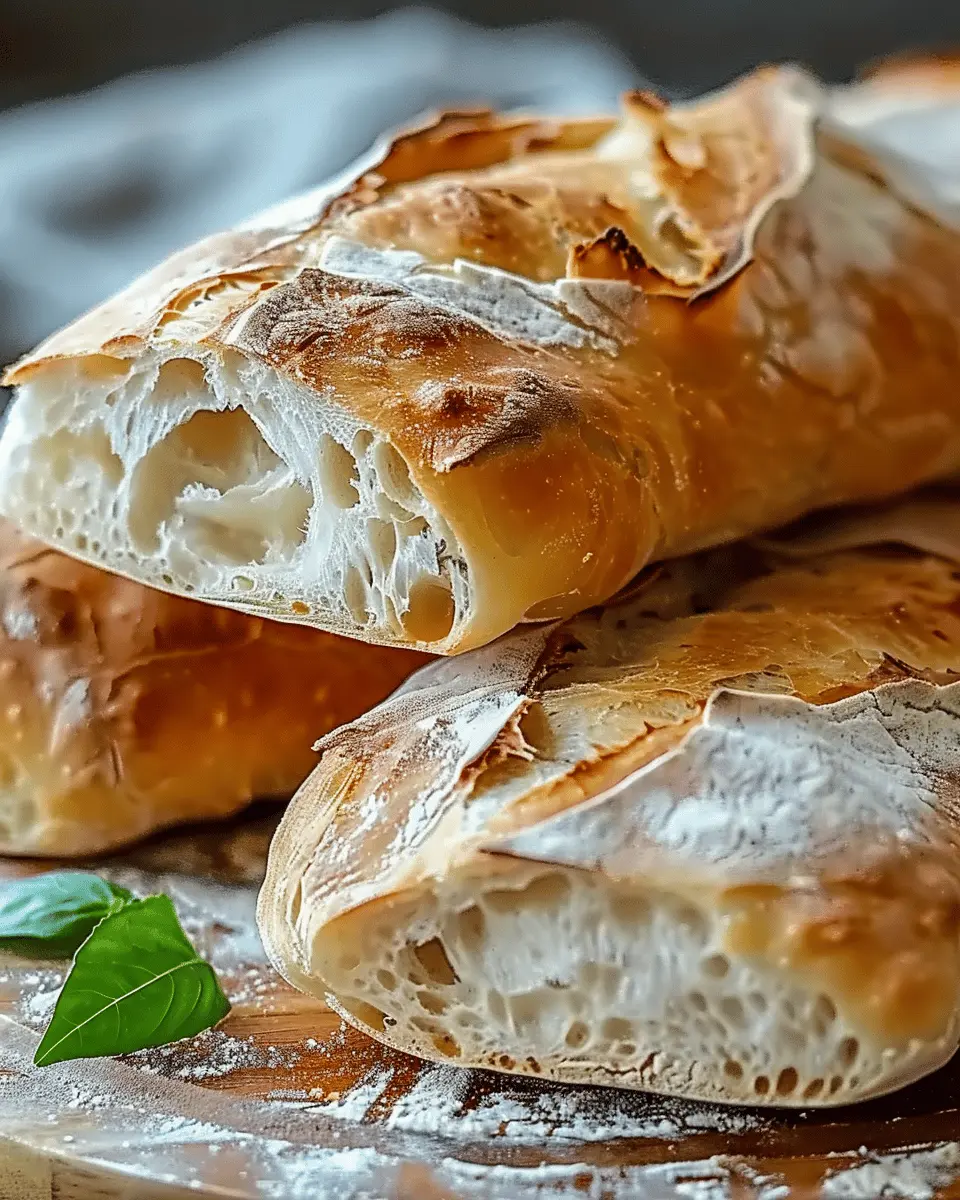
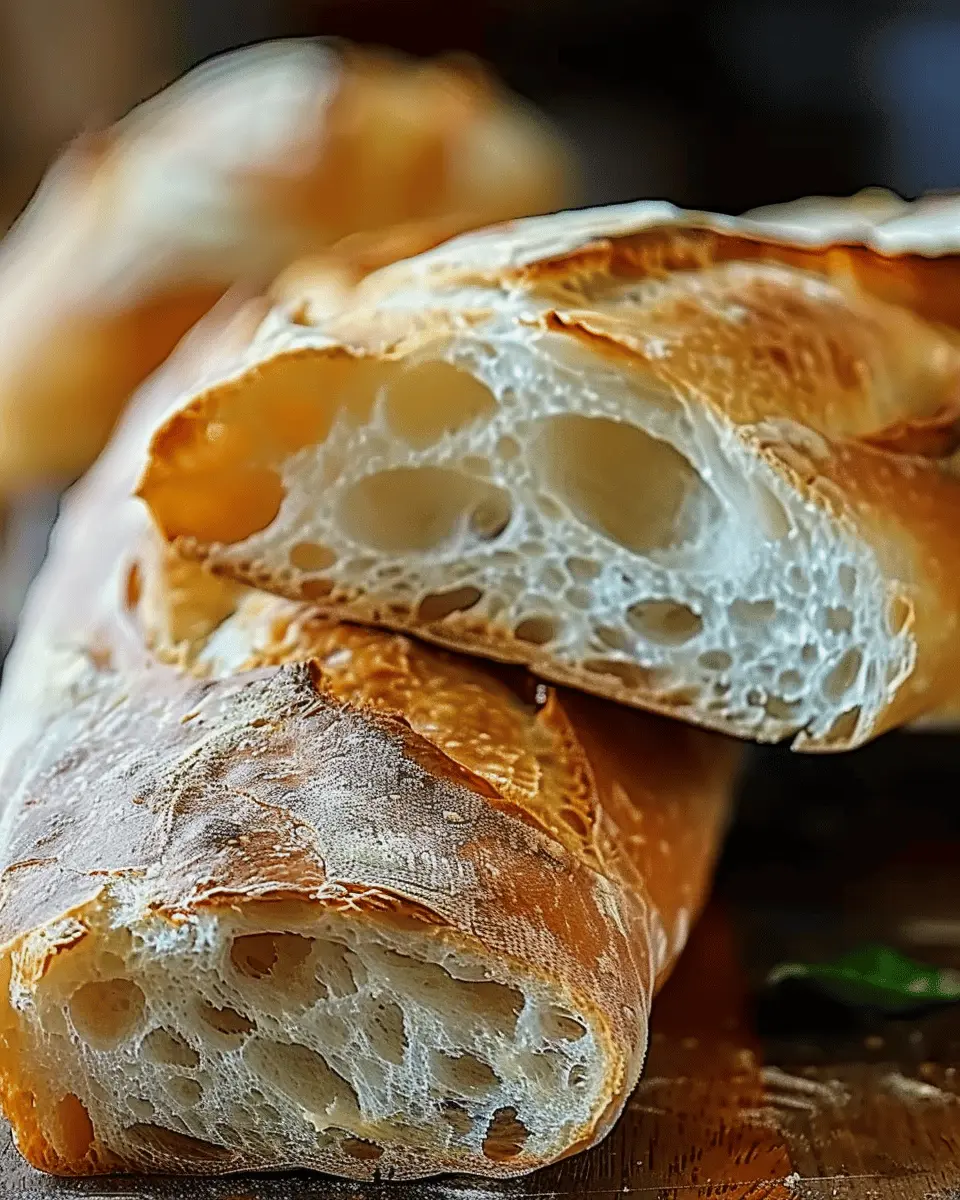
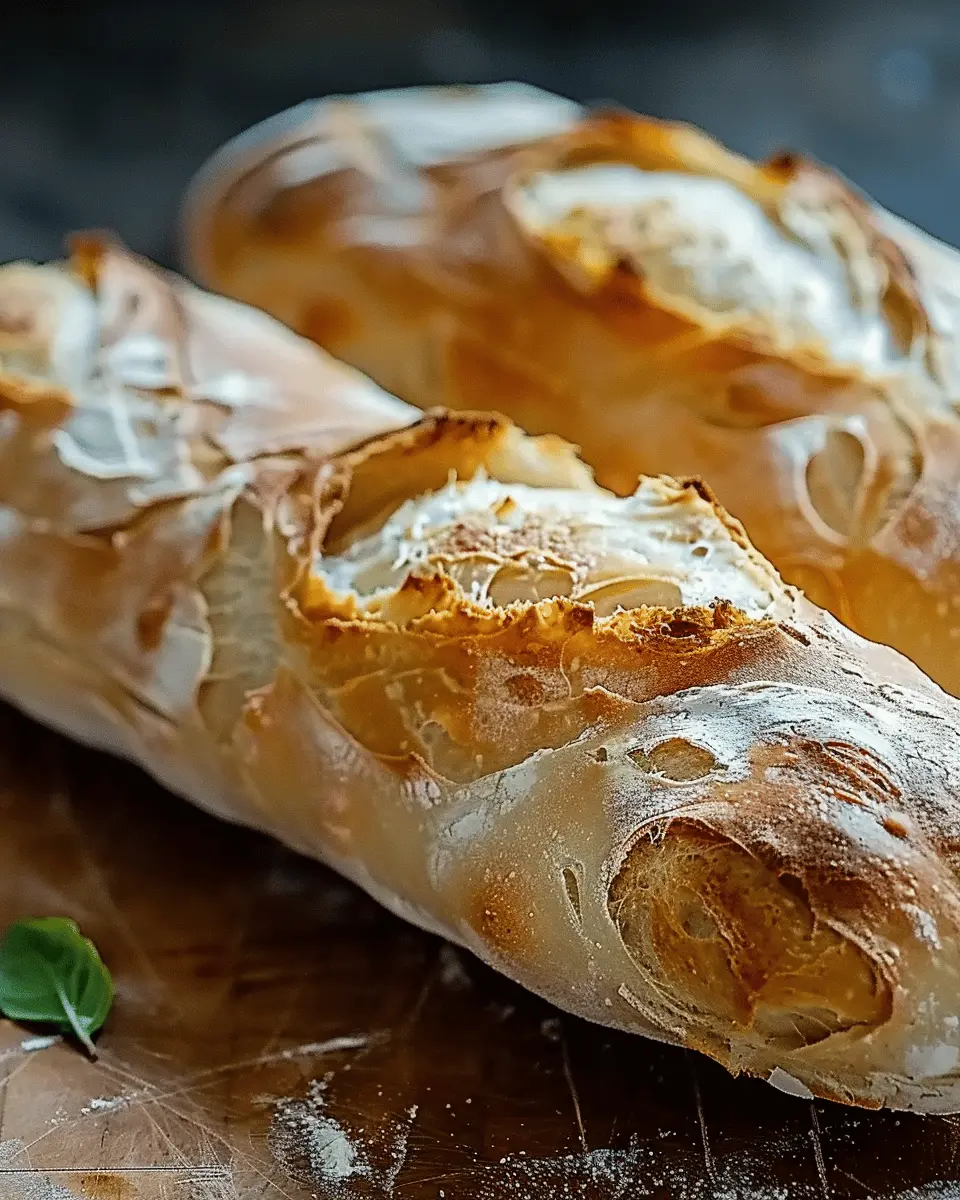
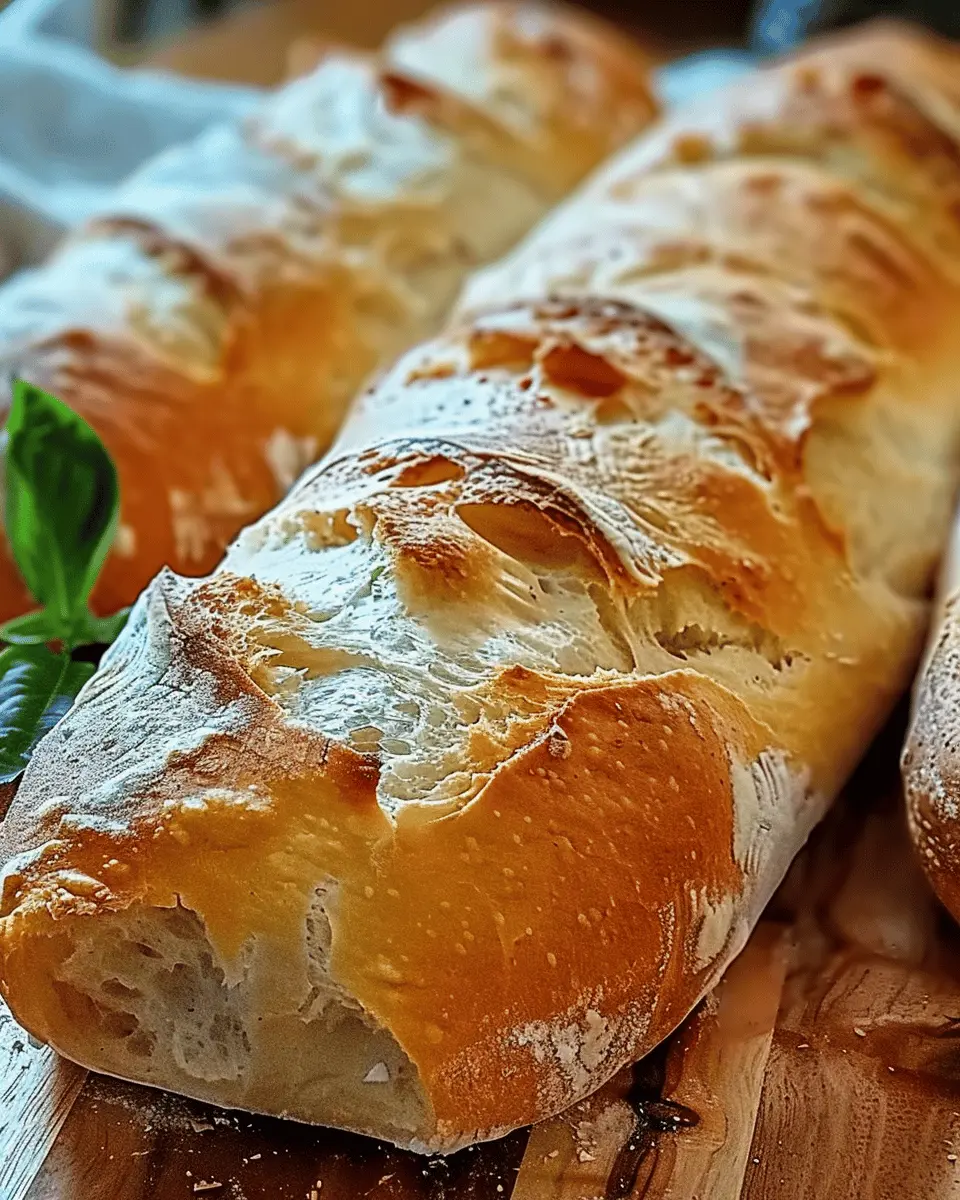
Now, let’s talk about crusty Italian bread. This beloved staple hails from the sun-kissed hills of Italy and has captured the hearts (and appetites) of food lovers everywhere. With its perfectly chewy crust and airy, soft interior, it’s the ideal accompaniment to various meals or simply enjoyed on its own with a drizzle of quality olive oil.
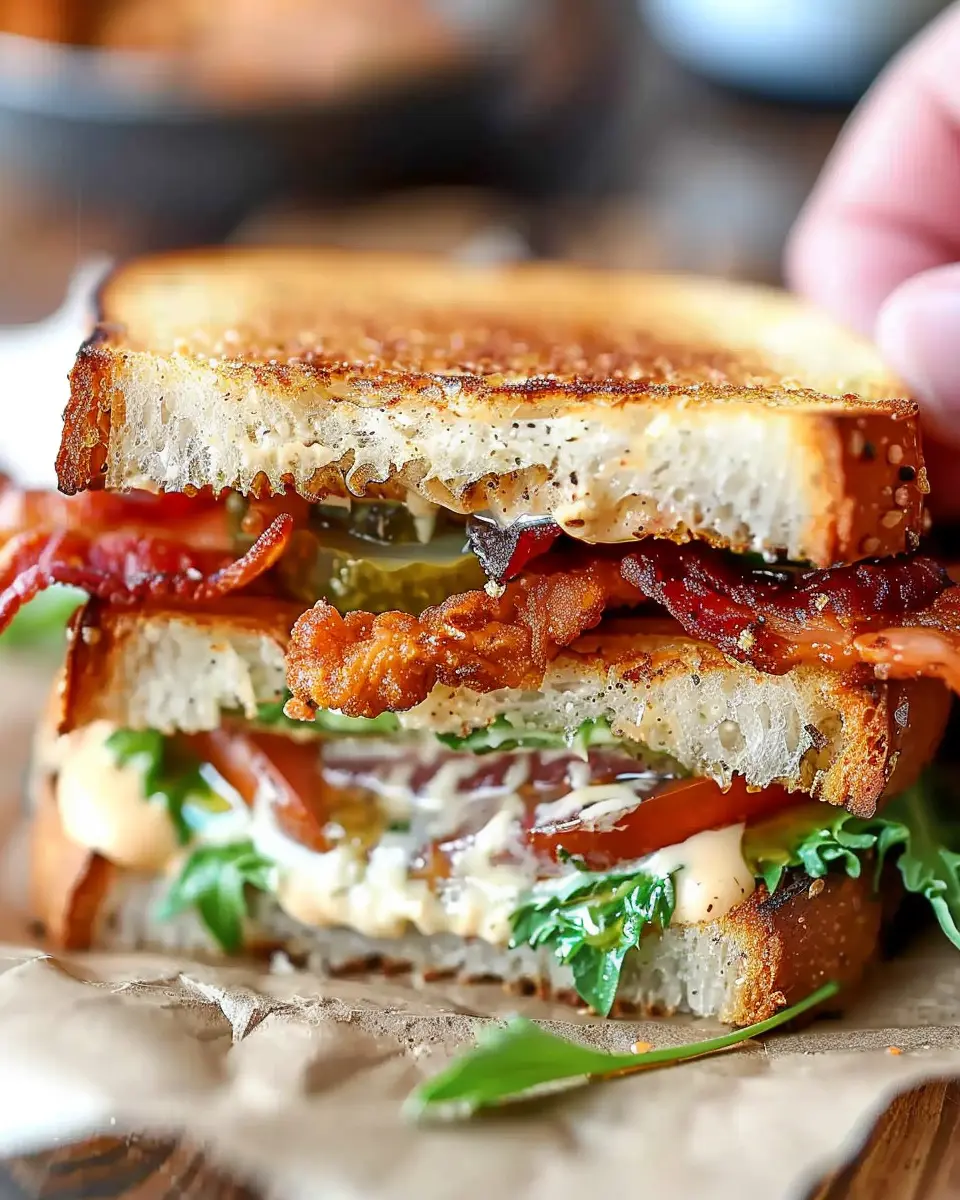
Imagine taking your first bite of that golden-brown crust, releasing a delightful crunch as you sink your teeth into the pillowy goodness inside. Use it to create delectable sandwiches with turkey bacon or chicken ham, or serve it alongside homemade soups and salads. The versatility of crusty Italian bread means it fits seamlessly into any meal, making it a favorite for both casual dining and special occasions.
With just a few basic ingredients and a dash of love, you can recreate this Italian classic in your own kitchen. Stay with us as we delve into the recipe and guide you through the delightful journey of making your very own crusty Italian bread. Prepare to enhance your culinary repertoire and embrace the joy of baking!
Ingredients for Crusty Italian Bread
Essential ingredients for a perfect loaf
To make an irresistible crusty Italian bread, you’ll need some basic ingredients that are staples in most kitchens. Here’s what you’ll gather:
- Flour: Go for high-protein bread flour for that chewy texture and structure.
- Water: Use lukewarm water to help activate the yeast effectively.
- Yeast: A mix of active dry yeast or instant yeast works wonders, creating that perfect rise.
- Salt: Essential for flavor and controlling yeast activity, don’t skip it!
These four ingredients are what truly create the foundation of great bread. It’s incredible how something so simple can yield such satisfying results!
Optional ingredients to enhance flavor
Want to elevate your crusty Italian bread? Consider adding:
- Olive Oil: A drizzle can add richness and a delightful aroma.
- Sugar or Honey: Just a touch will enhance browning and add a subtle sweetness.
- Herbs: Dried rosemary or oregano can infuse flavor directly into the bread.
These optional ingredients are perfect for customizing your bread to fit any meal or occasion. If you’re curious about the science behind bread-making, check out resources from the King Arthur Baking Company for expert insights!
Step-by-step Preparation of Crusty Italian Bread
Making crusty Italian bread at home is not just a delightful experience but also an impressive skill that will elevate your culinary repertoire. Let’s dive into the step-by-step preparation that will help you master this classic loaf.
Activate the Yeast
The beginning of any bread recipe lies in activating the yeast. Start by mixing 1 packet (or about 2¼ teaspoons) of active dry yeast with 1 cup of warm water (around 110°F). Make sure the water isn’t too hot, as it can kill the yeast. Add a pinch of sugar to the mixture; this will encourage the yeast to activate. Let it sit for about 5 to 10 minutes until it becomes frothy. This process is crucial, as properly activated yeast is the backbone of a successful crusty Italian bread.
Mix the Dough Ingredients
In a large mixing bowl, combine 3 cups of all-purpose flour and 1 teaspoon of salt. Once your yeast is frothy, stir it into the flour mixture. Using a wooden spoon or while wearing a pair of kitchen gloves, mix until the dough comes together. You want a cohesive, shaggy texture; don’t worry if it’s not completely smooth at this stage.
Knead the Dough for a Smooth Texture
Transfer your dough to a clean, floured surface. Knead it by pushing it away from you, folding it back over itself, and repeating this process. Aim for about 8 to 10 minutes. Kneading is the heartwarming part where you bond with your dough. You know it’s done when it feels smooth and elastic. If you’re new to kneading, don’t hesitate to look at some video tutorials here to get the technique down.
First Rise: The Importance of Patience
Time to be patient! Place your dough in a lightly greased bowl, cover it with a damp towel or plastic wrap, and let it rise in a warm spot for about 1 to 2 hours, or until it has doubled in size. This fermentation not only creates bubbles within the dough, producing distinct flavors, but it also gives your crusty Italian bread that signature airy texture. While you wait, you could tidy up your kitchen or whip up some other dishes.
Preheat the Oven and Prepare Your Baking Surface
While the dough is rising, preheat your oven to 450°F. If you have a baking stone, now’s the time to place it in the oven to heat up. If not, a baking sheet will work just fine. You might want to add a small oven-safe pan filled with water at the bottom of the oven to create steam, giving your bread a crispy crust.
Shape the Loaf and Prepare for the Second Rise
Once the dough has risen, gently punch it down to release excess air. Transfer it onto a floured surface and shape it into a round or oval loaf, depending on your preference. Place it on a parchment-lined baking sheet or directly on the stone, cover it again, and let it rise for another 30 minutes. This second rise will add to the fluffiness of your crusty Italian bread.
Scoring the Dough for That Authentic Look
Before baking, it’s essential to score the top of your dough with a sharp knife or a razor blade. This allows steam to escape during the bake and gives it that coveted artisan look. You can make shallow cuts in a pattern of your choice; the classic slash gives it a traditional touch.
Bake Your Crusty Italian Bread to Perfection
Now for the moment of truth! Carefully place the loaf in the preheated oven and bake for about 30 to 35 minutes. You’ll know it’s ready when the crust is a deep golden brown, and it sounds hollow when tapped on the bottom. Allow it to cool on a wire rack for at least 30 minutes before slicing. Patience will reward you with the most enticing aroma filling your kitchen.
And there you have it—your very own delicious, crusty Italian bread! Enjoy it fresh, or even use it for sandwiches with turkey bacon or chicken ham. Don’t forget to save a slice for that friend who always asks: “How do you make such amazing bread?” Happy baking!
Variations on Crusty Italian Bread
When it comes to crusty Italian bread, there’s a delightful world of variations waiting to be explored. Whether you’re in the mood for something aromatic or a bit healthier, you can easily tailor your loaf to delight your taste buds.
Herb-infused crusty Italian bread
Imagine biting into a slice of crusty bread, where each mouthful bursts with fragrant flavors. By incorporating fresh herbs, you can elevate your crusty Italian bread to a new level. Consider these combinations:
- Rosemary and Garlic: This classic pairing infuses your bread with earthy, savory notes. Simply mix finely chopped rosemary and minced garlic into your dough for a fragrant experience.
- Basil and Oregano: For a taste reminiscent of Italian kitchens, incorporate dried basil and oregano. This blend will give your bread a comforting, homey aroma.
Looking for a detailed guide on how to use herbs in baking? Check this out.
Whole wheat crusty Italian bread
If you’re aiming for a healthier twist, whole wheat crusty Italian bread is your friend. By opting for whole wheat flour, you’ll gain extra fiber and nutrients, all without sacrificing that signature crust. Here are some tips:
- Substitution: You can use half whole wheat flour and half all-purpose flour for a balance of flavor and texture while still making a wholesome bread.
- Add Seeds: Incorporating flaxseeds or sunflower seeds not only adds nutritional value but also gives your bread a delightful crunch.
Baking whole grain bread can be a wonderful way to embrace a healthier lifestyle. For more on the benefits of whole grains, visit The Whole Grains Council.
Whichever variation you decide to make, your homemade crusty Italian bread will surely impress friends and family alike!
Cooking Tips and Notes for Crusty Italian Bread
Tips for Achieving the Perfect Crust
A satisfying crunch is what takes crusty Italian bread to the next level. Here are some tips to achieve that coveted crust:
-
Steam It Up: Creating steam in the oven during the initial baking phase helps form a crispy outer layer. You can do this by placing a shallow pan of water on the bottom rack or spritzing the dough with water just before you shut the door.
-
Preheat Your Oven: Ensure your oven is thoroughly preheated; a hot oven is vital for that perfect “oven spring,” where the dough puffs up beautifully.
-
Use a Baking Stone: If you have one, a baking stone retains heat, helping deliver a crust that rivals your favorite bakery.
Helpful Baking Tools for Home Bakers
Quality tools can make a significant difference in your baking. Here are some essentials to consider:
-
Mixing Bowl: A sturdy, large mixing bowl will give you enough space to work with your dough without a mess.
-
Bench Scraper: Perfect for dividing dough and handling your bread, a bench scraper is a baker’s best friend.
-
Thermometer: Invest in an instant-read thermometer to ensure your bread is baked to the ideal internal temperature of around 190°F.
By incorporating these strategies and tools, you’ll be well on your way to mastering crusty Italian bread. Happy baking! If you’d like to learn more about baking techniques, check out resources from King Arthur Baking or America’s Test Kitchen for expert tips.
Serving Suggestions for Crusty Italian Bread
Pairing options: Spreads, cheeses, and soups
Crusty Italian bread shines brightest when paired with just the right accompaniments. For spreads, consider classic options like creamy butter, tangy olive tapenade, or a zesty hummus. As for cheeses, a nice aged parmesan or fresh mozzarella complements the bread’s texture beautifully. And if you’re in the mood for something warm, try dipping it into a hearty tomato or minestrone soup. The crunchy crust is perfect for sopping up every last drop, making each bite a delightful experience.
Creative ways to use leftover bread
Don’t let any of that crusty Italian bread go to waste! You can transform it into crunchy croutons simply by toasting cubes in olive oil with your favorite seasonings. Another great idea is to make a delicious bread pudding—a sweet or savory dish that utilizes leftovers wonderfully. Feeling adventurous? Try crafting a flavorful bruschetta using diced tomatoes, basil, and garlic for a quick appetizer. You’ll find some fantastic recipes here that can inspire your culinary creativity!
Time Breakdown for Crusty Italian Bread
Creating the perfect crusty Italian bread is a labor of love that requires careful timing. Here’s a quick breakdown to help you plan your baking adventure:
Preparation time
This stage takes about 20-30 minutes. You’ll mix your ingredients, knead the dough, and get everything ready for its first rise.
Rising time
Patience is key! Allow your dough to rise for 1-2 hours. The warmer your environment, the quicker it will double in size. Consider placing it in a slightly warm oven for optimal results (just make sure it’s off!).
Baking time
Once risen, bake your crusty Italian bread for 30-35 minutes at a high temperature. This is when the magic happens, and your kitchen will fill with delightful aromas.
Total time
So, how long will this take from start to finish? Plan for about 2.5 to 3 hours, factoring in prep, rise, and baking time. Enjoy every moment of creating your delicious crusty Italian bread!
For more tips and tricks on bread-making, check out sources like King Arthur Baking for expert advice. Happy baking!
Nutritional Facts for Crusty Italian Bread
Calories per slice
When indulging in crusty Italian bread, it’s good to know what you’re consuming! On average, a single slice contains around 80-100 calories. This makes it a delightful addition to your meals without overwhelming your calorie intake.
Key nutritional components
This rustic Italian delight features a variety of nutrients, including:
- Carbohydrates: Primarily made up of complex carbohydrates, providing a great energy source.
- Protein: Each slice offers around 2-3 grams of protein to help support muscle health.
- Fiber: Depending on the recipe, whole grain variations can pack more fiber, aiding in digestion.
- Vitamins and minerals: While not a significant source, you’ll find small amounts of B vitamins and iron.
For more details on the nutritional value of bread varieties, check out resources like the USDA FoodData Central.
Understanding these facts can help you enjoy your crusty Italian bread responsibly, whether you’re pairing it with a lovely olive oil dip or making tasty sandwiches!
FAQs about Crusty Italian Bread
Why is my bread not crusty?
If you’re wondering why your crusty Italian bread lacks that delightful crunch, it could be due to a few reasons. First, the dough may not have had enough hydration. A wetter dough can produce a thicker crust. Make sure you’re using the right flour type—high-protein bread flour typically works best. Another factor is the baking time; underbaking can lead to a soft crust, so aim for that beautiful golden-brown color. Lastly, placing a pan of water in the oven can create steam, resulting in an even crustier exterior.
Can I freeze crusty Italian bread?
Absolutely, you can freeze your crusty Italian bread! Freezing is a great way to maintain its freshness. Just ensure the bread is completely cool before wrapping it tightly in plastic wrap or aluminum foil and placing it in an airtight container. When you’re ready to enjoy it, you can either thaw it at room temperature or pop it directly into the oven for a few minutes. This will revitalize the crust and make it taste freshly baked again.
How to store crusty Italian bread properly to maintain freshness?
To keep your crusty Italian bread fresh, store it in a paper bag at room temperature rather than plastic, which can trap moisture. If you find that you won’t eat it within a few days, consider freezing some as mentioned earlier. It’s a handy way to have delicious bread at your fingertips without the worry of spoilage. Be sure to check King Arthur Baking for more tips on bread storage.
With these tips in mind, you’ll be all set to enjoy delicious crusty Italian bread whether fresh from the oven or saved for later!
Conclusion on Crusty Italian Bread
Embracing homemade baking as a lifestyle choice
Baking your own crusty Italian bread isn’t just about enjoying fresh loaves; it’s a chance to connect with the food you nourish yourself with. Creating bread at home allows you to experiment with different ingredients and techniques, giving your meals a personal touch. Consider exploring resources like King Arthur Baking for tips on making the most of your baking ventures.
Your journey to becoming a crusty bread maestro
Becoming a maestro of crusty Italian bread is an adventure, whether you’re baking for yourself or sharing with loved ones. Each loaf tells a story of time, patience, and a little bit of flair. Embrace the process—trial and error is part of the fun! As you knead, rise, and bake, you’ll build confidence in your skills and create something that not just fills your stomach, but warms your heart. Your kitchen can be a haven of homemade goodness, just waiting for your creativity to flourish!
PrintCrusty Italian Bread: The Best Homemade Recipe for Beginners

Learn how to make the perfect crusty Italian bread at home with this easy recipe designed for beginners.
- Prep Time: 15 minutes
- Cook Time: 35 minutes
- Total Time: 2 hours 50 minutes
- Yield: 1 loaf
- Category: Bread
- Method: Baking
- Cuisine: Italian
- Diet: Vegetarian
Ingredients
- 4 cups all-purpose flour
- 1 1/2 cups warm water
- 2 teaspoons salt
- 1 teaspoon sugar
- 2 teaspoons instant yeast
Instructions
- In a large bowl, mix the flour, salt, and sugar.
- Add the warm water and yeast to the dry ingredients and mix until a dough forms.
- Knead the dough on a floured surface for about 10 minutes until smooth.
- Place the dough in a greased bowl, cover, and let rise for 1-2 hours.
- Preheat your oven to 450°F (230°C) and place a baking stone or sheet inside.
- Punch down the dough and shape it into a loaf.
- Allow the loaf to rise for another 30 minutes.
- Score the top of the loaf and place it in the oven to bake for 30-35 minutes until golden brown.
- Let cool on a wire rack before slicing.
Notes
- For extra crustiness, place a pan of water in the oven while baking.
Nutrition
- Serving Size: 1 slice
- Calories: 150
- Sugar: 1g
- Sodium: 200mg
- Fat: 1g
- Saturated Fat: 0g
- Unsaturated Fat: 0g
- Trans Fat: 0g
- Carbohydrates: 30g
- Fiber: 1g
- Protein: 5g
- Cholesterol: 0mg